fbpx

Easy Mexican Street Corn Recipes for Summer

mexican street corn

Discover authentic recipes for Mexican street corn and learn how to make this beloved Mexican dish at home. Perfect for summer BBQs and outdoor gatherings.

When the sun is high and the air is filled with the smell of BBQs, one dish shines bright: Mexican street corn, or elote. It’s a mix of sweet, smoky corn, tangy crema, and spicy seasonings. This dish can take you straight to Mexico’s lively streets, right from your backyard.

Vibrant Mexican street corn, grilled to perfection, topped with creamy cheese, fresh cilantro, and a sprinkle of chili powder, set against a sunny outdoor summer backdrop with colorful decorations – BestWayRecipes.

We’ll look at simple, delicious recipes for Mexican street corn. From classic grilled elote to refreshing salads and air fryer versions. These dishes are full of flavor and perfect for summer. They’re great for any outdoor event or when you just want a taste of Mexico1.

Key Takeaways

  • Discover the origins and cultural significance of traditional Mexican street corn (elote)
  • Explore essential ingredients and techniques for perfecting your homemade elote
  • Dive into classic elote recipes as well as creative variations like street corn salad and air fryer versions
  • Learn tips and tricks for grilling and preparing the perfect corn every time
  • Customize your elote experience with a variety of sauces, toppings, and spice level options

What is Mexican Street Corn (Elote) and Its Origins

Elote, the beloved Mexican street food, has won hearts worldwide2. It’s grilled corn on the cob, smothered in mayonnaise, lime juice, chili powder, and Cotija cheese. This dish has ancient roots in Mexican cuisine, dating back thousands of years3.

Traditional Ingredients in Authentic Elote

The traditional elote recipe is simple yet flavorful4. It starts with grilled or boiled corn, then it’s slathered in butter, Mexican crema, and mayonnaise. Spices like homemade chili or taco seasoning add depth. Finally, it’s topped with Cotija cheese and a squeeze of lime4.

Cultural Significance in Mexican Cuisine

Corn, or maize, has been a key part of Mexican diets for thousands of years2. Elote, blending indigenous and European influences, is a favorite street food in Mexico. It shows the country’s culinary evolution and fusion2.

Street Food vs Home Cooking Variations

Elote is not just for street vendors; it’s also a hit in home kitchens. Different regions in Mexico have their own twists, showing the dish’s versatility2. Some like it creamier, using Mexican crema instead of mayonnaise. Others add cucumbers or lime wedges for a fresh touch3. There’s even a version called esquites, which lets people get creative2.

Elote’s popularity as street food comes from its affordability and visual appeal. It’s become a hit on Instagram, making it a modern favorite2. Whether enjoyed on the street or at home, elote is a beloved part of Mexican culture. It combines tradition and innovation in every delicious bite3.

Essential Ingredients for Perfect Mexican Street Corn

To make authentic Mexican street corn, also known as elote, you need the right ingredients. The main ingredient is fresh, sweet corn5. Look for 4-5 ears of corn that’s been freshly shucked. If corn is not in season, frozen kernels can work too5.

Other key ingredients include creamy mayonnaise and sour cream or Mexican crema6. You’ll also need lime juice and zest, chili powder, and lots of cotija or queso fresco cheese5. Add finely chopped cilantro and a diced jalapeño for extra flavor and heat5.

Grilling the corn requires a light coat of olive oil or melted butter for that char5. Grill it for 3-5 minutes on each side over medium heat5. If you’re using an air fryer, cooking time is shorter6.

These ingredients mix to create a creamy, tangy, and slightly spicy taste. With some prep, you can enjoy this flavor at home5.

“Corn is the heartbeat of Mexican cuisine, and elote is a beloved street food that captures the essence of its culinary culture.”

Recipes for Street Corn: From Classic to Creative

Discover a variety of Mexican street corn (elote) recipes that showcase its vibrant flavors. From the traditional grilled version to new salad and air fryer twists, these recipes bring Mexico’s lively streets to your home7.

Classic Grilled Elote Recipe

Try the quintessential grilled Mexican street corn. Brush it with melted butter and mayonnaise, then sprinkle with crumbled cotija cheese and fresh lime juice. This recipe captures the true taste of elote, taking you to Mexico’s bustling markets7.

Mexican Street Corn Salad (Esquites)

For a healthier twist, make the Mexican Street Corn Salad, or Esquites. Sauté the corn kernels, then mix with a creamy dressing of mayonnaise, sour cream, lime juice, and chili powder. Add crumbled cotija or queso fresco cheese for a summer-perfect corn salad8.

Air Fryer Mexican Street Corn Version

Get the flavors of Mexican street corn with the air fryer’s ease. Preheat to 400°F, cook the corn for 8 minutes, turning halfway. Coat with mayonnaise, cotija cheese, and chili powder or cayenne. This recipe is a healthy, hassle-free way to enjoy elote7.

“Vibrant Mexican street corn on a rustic wooden table, featuring grilled corn on the cob slathered in creamy mayo, sprinkled with crumbled cotija cheese, chili powder, and fresh cilantro, with lime wedges on the side, sunlit summer background, BestWayRecipes.”

Whether you prefer the classic grilled elote, the refreshing corn salad, or the air fryer version, these recipes will delight your taste buds. They bring Mexico’s vibrant flavors right to your table78.

Tips for Grilling and Preparing Corn

Grilling corn on the cob is a fun way to enjoy summer’s sweetness. To get the best grilled corn on the cob, just follow these easy steps:

  1. Preheat your grill to medium-high heat9.
  2. Brush the corn with olive oil to prevent sticking and add flavor10.
  3. Grill the corn for about 2 minutes per side, until you see nice char marks10.
  4. Try an air fryer Mexican street corn for a twist. It cooks the corn perfectly, keeping it tender9.

To cut corn off the cob, stand the ear upright and slice downward with a sharp knife10. For a quick stovetop method, heat oil or butter in a large skillet. Cook the corn kernels for about 5 minutes until lightly charred. Add garlic in the last 30 seconds for extra flavor10.

Preparation MethodTime RequiredServing SizeCalories
Grilled Mexican Street Corn15 minutes101 serving10235 calories10
Mexican Street Corn (Elote)25 minutes94 servings9185 kcal per serving11

With these tips, you’ll be a pro at grilled corn on the cob and roasted corn recipes for your summer parties10119.

mexican street corn

Grilled corn on the cob glistening with melted butter, sprinkled with cotija cheese and chili powder, surrounded by vibrant summer vegetables, smoky grill marks visible, set against a warm sunset backdrop, capturing the essence of a summer cookout, BestWayRecipes.

Sauces, Toppings, and Variations

Mexican street corn, or elote, is a favorite summer snack. It’s more than just grilled corn. The secret to making it special is in the sauces, toppings, and creative twists you can try12.

Classic Elote Sauce Recipe

The perfect elote sauce combines mayonnaise, sour cream, lime juice, and spices. It’s creamy, tangy, and slightly smoky12. To make it, mix 3 tablespoons of mayonnaise, 2 tablespoons of sour cream, and lime zest. Add 1/2 teaspoon of fresh lime juice, 1/4 teaspoon of cayenne pepper, and 1/4 teaspoon of chili powder12.

Cheese Options: Cotija, Queso Fresco, and Substitutes

Grilled corn isn’t complete without cotija or queso fresco cheese13. If these cheeses are hard to find, feta or parmesan are great alternatives13.

Spice Level Customization

Want more heat in your elote? Adjust the chili powder in the sauce or add diced jalapeños13. Just remember to consider your guests’ taste preferences.

Whether you stick to traditional grilled elote or try new variations, these additions will make your dish better14. Enjoy the bold flavors and colors of this summer favorite13.

IngredientAmount
Corn on the Cob4 ears
Mayonnaise3 tablespoons
Sour Cream2 tablespoons
Lime Zest1/4 – 1/2 teaspoons
Lime Juice1/2 teaspoon
Chili Powder1/4 teaspoon
Cayenne Pepper1/4 teaspoon
Cotija Cheese1 cup, crumbled

Conclusion

Mexican street corn recipes are a fun and tasty way to enjoy summer corn. You can choose from grilled elote, a salad version, or air fryer recipes. These dishes mix great textures and flavors15.

They’re perfect for summer parties, barbecues, or as a special side dish. You can also make them your own by changing spices and cheeses like cotija, feta, or queso fresco1617.

Adding lean proteins and veggies makes these dishes healthy and delicious17.

These recipes for street corn, easy corn recipes, and summer corn recipes bring the lively spirit of Mexico to your table. They’re easy to make and full of bright, summery flavors151617.

FAQ

What is Mexican street corn (elote)?

Mexican street corn, or elote, is a summer favorite. It’s grilled corn on the cob with a creamy, tangy, and spicy mix. This dish is a staple in Mexico, sold by street vendors.

What are the key ingredients in authentic elote?

Classic elote includes fresh sweet corn, mayonnaise, and sour cream. It also has lime juice and zest, chili powder, and smoked paprika. Don’t forget the cotija or queso fresco cheese, cilantro, and jalapeño for heat.

How do I make Mexican street corn at home?

To make elote at home, grill or roast the corn. Then, top it with a sauce of mayonnaise, sour cream, lime, and spices. You can also try esquites, a Mexican street corn salad.

What are some variations of Mexican street corn recipes?

Besides the classic grilled elote, there’s the Mexican Street Corn Salad (Esquites) and Air Fryer Mexican Street Corn. These offer easy and creative ways to enjoy this dish.

How do I grill and prepare the corn for Mexican street corn?

Preheat the grill to medium-high heat. Brush the corn with olive oil and grill for 2 minutes per side. To cut the corn, stand the ear upright and slice downward. You can also sauté the kernels in a skillet for about 5 minutes.

What are some topping and sauce variations for Mexican street corn?

The classic elote sauce combines mayonnaise, sour cream, lime, chili powder, and smoked paprika. You can use different cheeses like cotija, queso fresco, feta, or parmesan. For more spice, adjust the chili powder or add diced jalapeños.

  1. Mexican Street Corn Salad – Love and Lemons – https://www.loveandlemons.com/mexican-street-corn-salad/
  2. Exploring Mexican Street Corn: A Delightful Culinary Journey | Tijuana Flats- Tijuana Flats – https://www.tijuanaflats.com/blog/mexican-street-corn-elote-guide
  3. All Ears for Elote – Edible Reno-Tahoe – https://ediblerenotahoe.com/magazine/elote/
  4. Mexican Street Corn Recipe – https://blogghetti.com/mexican-street-corn/
  5. The Ultimate Mexican Street Corn Recipe – https://www.bakingbeauty.net/best-mexican-street-corn-aka-elote-recipe/
  6. Mayo Haters Have Been VERY Quiet Since We Created This Elotes Recipe – https://www.delish.com/cooking/recipe-ideas/a43932602/elote-recipe/
  7. Mexican Street Corn Chicken Tacos – https://www.platingsandpairings.com/mexican-street-corn-chicken-tacos/
  8. Mexican Street Corn Salad with Avocado – https://soufflebombay.com/mexican-street-corn-salad/
  9. Elote – Mexican Street Corn – https://www.krazykitchenmom.com/elote-mexican-street-corn/
  10. Grilled Mexican Corn (Elote) – https://www.averiecooks.com/grilled-mexican-corn-elote/
  11. Mexican Street Corn Recipe | Julie Blanner – https://julieblanner.com/mexican-corn/
  12. Elote: Mexican Style Street Corn – https://ourbestbites.com/elote-mexican-corn-on-the-cob/
  13. Mexican Street Corn (Elotes) – Slender Kitchen – https://www.slenderkitchen.com/recipe/mexican-street-corn
  14. Elote (Mexican Street Corn on the Cob) – https://princesspinkygirl.com/elote-mexican-street-corn/
  15. Authentic elote recipe: Easy Mexican Street Corn – https://www.asparkleofgenius.com/authentic-elote-recipe/
  16. Elote Dip – Mr Make it Happen – https://mrmakeithappen.com/elote-dip/
  17. Street Corn Chicken Rice Bowl Recipe – https://creativescookery.com/street-corn-chicken-rice-bowl-recipe/

Delicious Baked Chicken Breast Recipes

baked chicken breast recipes

Discover mouthwatering baked chicken breast recipes for quick and healthy dinners. Learn how to make juicy, flavorful chicken that’s perfect for any night of the week.

The smell of baked chicken in the kitchen brings back warm memories. My mom’s baked chicken breasts were a favorite when I was young. She served them with mashed potatoes and a green salad. The chicken’s juicy meat and crispy skin were always the best part1.

Baked chicken breasts are now a staple in my home. They’re a quick, healthy meal that everyone loves. These recipes are perfect for a fast dinner or a special dish to impress guests1.

baked chicken breast recipes

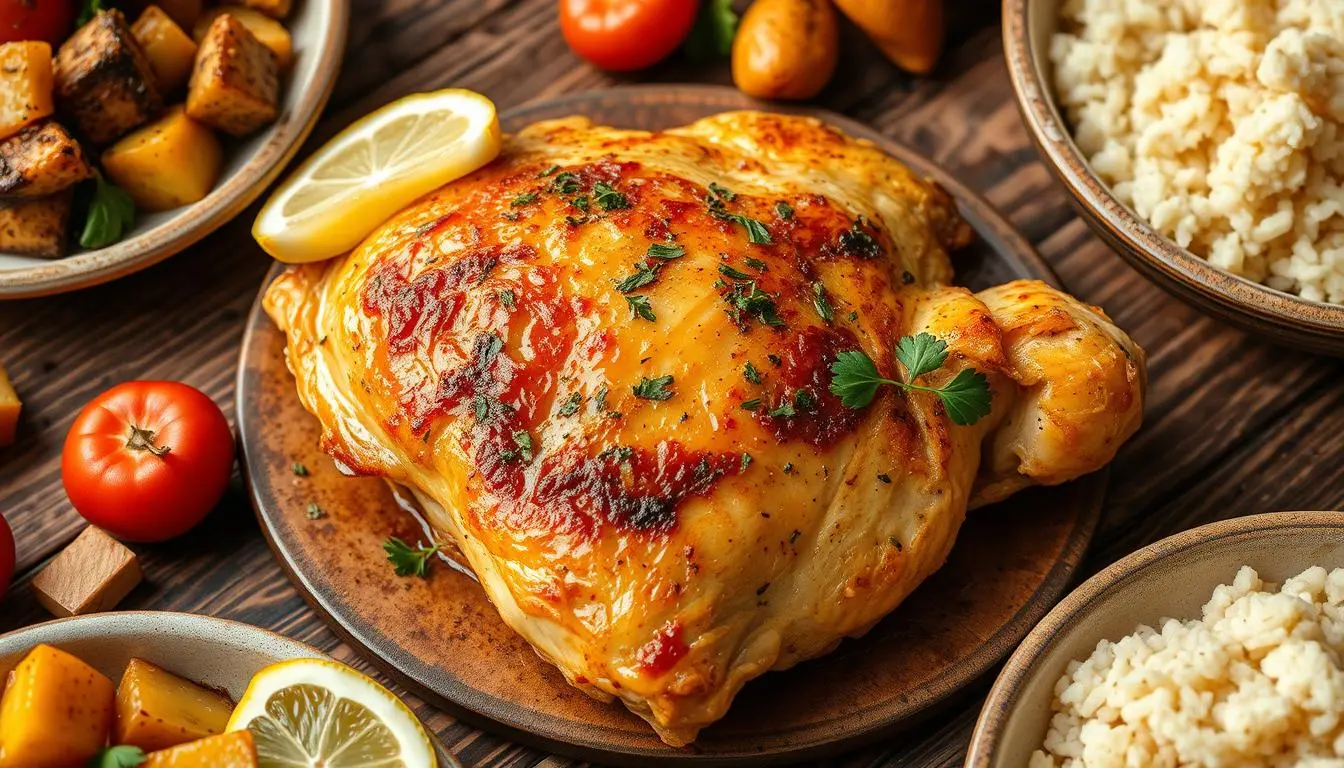
A golden-brown baked chicken breast on a rustic wooden table, garnished with fresh herbs and lemon slices, surrounded by colorful side dishes like roasted vegetables and fluffy rice, soft natural lighting highlighting the texture and juiciness of the chicken.

Key Takeaways

  • Baked chicken breasts are a lean, high-protein dinner option that are easy to prepare.
  • The key to juicy, flavorful baked chicken is proper seasoning, high-heat roasting, and letting the meat rest before serving.
  • Baked chicken breasts can be stored in the refrigerator for up to 3 days or frozen for up to 3 months1.
  • A good meat thermometer, either an instant-read version for around $14 or a wireless dual-probe model for about $33, is an essential tool for ensuring your chicken is cooked to the safe internal temperature of 165°F1.
  • The Baked Chicken Breasts recipe on our site has a rating of 4.9 out of 5 from over 1,300 reviews1.

Why Baked Chicken Breasts are a Dinnertime Favorite

Baked chicken breasts are a top pick for dinner in many homes. They are lean, healthy, and packed with protein. This makes them perfect for those who want a healthy chicken dinner ideaslow-carb chicken recipes, or high-protein chicken dishes2.

Preparing baked chicken breasts is simple. Just follow a 5-step method for perfectly cooked chicken2. Use a 450°F oven and roast boneless chicken breasts for 17 minutes. This ensures they are juicy and full of flavor2. It’s quick and saves time on busy weeknights.

Lean and Healthy Protein Option

Chicken breasts are a great source of lean protein. They offer 29 grams of protein per 4-ounce serving3. This helps you feel full and supports fitness and weight management goals.

Quick and Easy to Prepare

The baking method for chicken breasts is easy and fast2. It includes a 15-minute brining process and a 17-minute baking time. This results in juicy and flavorful chicken every time2. It’s perfect for quick, nutritious meals on busy weeknights.

Baked chicken breasts are a go-to dinner option for many families due to their incredible versatility and impressive nutritional profile.

Oven TemperatureCooking Time
350°F30-35 minutes
375°F25-30 minutes
400°F22-25 minutes
425°F18-22 minutes
450°F15-18 minutes

The baking time for chicken breasts varies with oven temperature4. Higher temperatures mean shorter cooking times. Always check the chicken reaches 165°F to ensure it’s fully cooked and safe3.

In conclusion, baked chicken breasts are a favorite for dinner. They offer great nutrition, are easy to make, and versatile. Whether you’re after healthy chicken dinner ideaslow-carb chicken recipes, or high-protein chicken dishes, baked chicken breasts are an excellent choice.

Perfectly Juicy baked chicken breast recipes

Making perfectly juicy baked chicken breasts is simpler than you might think. Just follow a 5-step method to keep the chicken moist and tasty5. Start by brining the chicken in saltwater to keep it moist. Next, brush the chicken with oil or melted butter, then rub it with herbs and spices6.

Roast the chicken at 425°F to get a crispy outside without overcooking7. Let the chicken rest for a few minutes before serving. This allows the juices to spread evenly through the meat.

By following these steps, you can make delicious juicy baked chicken breast recipes every time5. Cooking times depend on the chicken’s size. Larger breasts take 20-22 minutes, while medium ones need 18-20 minutes6. Always check the chicken’s internal temperature with a meat thermometer. It should be 165°F7.

This method results in a juicy baked chicken breast that’s low in fat and high in protein5. A serving has 386 calories, 49 grams of protein, 18 grams of fat, and 5 grams of carbs5. It’s a tasty and healthy choice for dinner or meal prep.

baked chicken breast recipes

Juicy baked chicken breasts garnished with fresh herbs, drizzled with a golden honey glaze, resting on a rustic wooden cutting board, surrounded by vibrant roasted vegetables, warm lighting highlighting the tender texture.

Whether you want a classic oven-baked chicken breast or chicken breast recipes no breading, this method works every time6. With basic ingredients and simple steps, you can make tender, flavorful chicken breasts. Your family will love them.

Seasoning and Flavor Variations

Baked chicken breast recipes offer endless seasoning and flavor options. The basic recipe might use paprika, garlic powder, salt, and pepper. But, you can easily change the flavors to match your taste8.

Classic Herb and Spice Blends

Make your baked chicken breasts special with classic herb and spice blends8. An Italian seasoning mix adds a Mediterranean flair, while Cajun seasoning brings a bold, spicy taste8. Try using dried herbs like rosemary, thyme, or oregano for a unique flavor8.

Marinades and Sauces

Marinating chicken breasts before baking adds extra flavor9. Use a mix of olive oil, lemon juice, garlic, and herbs and spices for a marinade9. Or, bake the chicken and serve it with a creamy mushroom sauce or tangy barbecue sauce8.

Trying different seasoning blends and marinades lets you make many low-carb chicken recipes and high-protein chicken dishes. These dishes will surely impress your family and friends810.

baked chicken breast recipes

A beautifully arranged baked chicken breast seasoned with a colorful blend of herbs and spices, garnished with fresh parsley, lemon wedges, and roasted vegetables on a rustic wooden table, soft natural lighting highlighting the juicy texture and vibrant colors of the dish.

“The key to juicy, flavorful baked chicken breasts is all in the seasoning and preparation. Experiment with a range of herbs, spices, and marinades to find your perfect flavor combination.”

Serving Suggestions and Side Dishes

Baked chicken breasts are great for many delicious meals11. You can pair them with classic potatoes, fresh vegetable salads, or even mac and cheese11. These sides add flavor to the chicken and meet different tastes11.

Side dishes should offer variety12. The recipes include a mix of flavors, textures, and cooking methods12. They’re perfect for any season, making the meal complete12.

For a crispy contrast, 40% of the sides are creamy or saucy12. Also, 15% are pasta or grain-based salads, adding freshness to your meal12. The recipes mix cuisines like Southwestern, Asian, German, and Southern U.S12..

To balance the chicken’s savory taste, 25% of the sides are creamy or tangy12. The cooking methods are diverse, including boiling, roasting, grilling, and slow-cooking12. For ease, 15% use quick ingredients like pre-shredded veggies or canned beans12.

These healthy chicken dinner ideas and easy oven baked chicken recipes have something for everyone1112.

Side DishCooking TimeCooking MethodKey Ingredients
Crispy Parmesan Roasted Brussels Sprouts30 minutesRoastedBrussels sprouts, Parmesan cheese, olive oil, garlic, salt, pepper
Creamy Mashed Potatoes25 minutesBoiledPotatoes, milk, butter, salt, pepper
Lemon Garlic Roasted Asparagus20 minutesRoastedAsparagus, olive oil, garlic, lemon juice, salt, pepper
Bacon and Cheddar Mac and Cheese40 minutesBakedElbow macaroni, cheddar cheese, bacon, milk, butter, flour

Conclusion

Baked chicken breasts are a great choice for a healthy, tasty, and simple dinner. By following the 5-step method in the recipes, you can make juicy and flavorful chicken every time. This recipe is versatile, letting you add your own seasonings and serve it in many ways.

This dish is lean and high in protein, ready in just 40 minutes. Make sure the chicken reaches 165 degrees F to be safe. With a 4.82 out of 5 rating from 16 votes, these recipes are a hit at home.

Whether you like classic flavors or bold marinades, there’s a recipe here for you. Serve the chicken with your favorite sides for a complete meal.

When buying chicken, choose organic or free-range for better living conditions. Organic chickens in the UK are raised for at least 70 days. Free-range chickens have some outdoor time but live in more crowded conditions. Supporting ethical farming makes your meals feel more rewarding.

Looking for a quick dinner or a special meal? These baked chicken breast recipes are perfect. Enjoy the taste of juicy chicken and the ease of a healthy meal.

Additional tags

This article is a complete guide to baked chicken breast recipes. It offers a lot of tips for making tasty, healthy chicken dinner ideas. You’ll learn about the benefits of this lean protein and how to make juicy baked chicken breast. It’s all about mastering this easy oven baked chicken dish13.

Looking for chicken breast recipes no breading or low-carb chicken recipes and high-protein chicken dishes? This guide has you covered. It includes a simple seasoning blend and ideas for flavorful boneless skinless chicken breast recipes. It’s perfect for busy families14.

Learn about the best chicken breast size and brining method. Find out the perfect baking temperature and resting time. This article gives you all the tips and techniques for perfectly cooked and juicy baked chicken breast. With these insights, you’ll make delicious and nutritious chicken meals that everyone will love.

FAQ

What are the benefits of baked chicken breasts?

Baked chicken breasts are a lean and healthy choice. They are low in fat and calories but high in protein. This makes them a great option for dinner. Plus, they are quick and easy to make, with a simple 5-step method for perfect results.

What is the key to making perfectly juicy baked chicken breasts?

To make perfectly juicy baked chicken breasts, follow the 5-step method. This includes brining the chicken to keep it moist. Then, brush it with butter or oil and rub it with a simple seasoning blend.

Roast it at a high temperature to get a crispy exterior. Lastly, let it rest before serving.

Can the seasoning on the baked chicken breasts be customized?

Yes, you can customize the seasoning on baked chicken breasts. The recipe offers a simple blend of paprika, garlic powder, salt, and pepper. But, you can also use Italian seasoning, Cajun seasoning, or Mediterranean blends for different flavors.

For even more flavor, marinate the chicken in sauces or marinades before baking.

How can baked chicken breasts be served?

Baked chicken breasts are versatile and can be served in many ways. Slice them and add them to salads, sandwiches, or wraps. Or, serve them as the main course with sides like mashed potatoes, roasted vegetables, or a green salad.

The recipe suggests side dishes that go well with baked chicken.

  1. Baked Chicken Breast | Gimme Some Oven – https://www.gimmesomeoven.com/baked-chicken-breast/
  2. The Most Popular Chicken Breast Recipe on Google Makes My Life Super Easy – https://www.simplyrecipes.com/most-popular-chicken-recipe-on-google-8708529
  3. Sheet pan Baked Chicken and Veggies – https://healthyfitnessmeals.com/sheet-pan-chicken-recipe/
  4. Oven Baked Chicken Breasts – https://www.yellowblissroad.com/baked-chicken-breasts/
  5. Juicy Oven Baked Chicken Breast – https://cafedelites.com/oven-baked-chicken-breast/
  6. Oven Baked Chicken Breast – https://iwashyoudry.com/oven-baked-chicken-breast-recipe/
  7. BEST Baked Chicken Breast – Kristine’s Kitchen – https://kristineskitchenblog.com/baked-chicken-breast/
  8. 75 Easy Baked Chicken Dinners That Are Anything But Boring – https://www.delish.com/cooking/g1683/baked-chicken/
  9. Baked Chicken Breast Recipe – https://www.primaverakitchen.com/paleo-lemon-roasted-breast-chicken/
  10. Juicy Oven Baked Chicken Breast (+ 6 Flavor Variations) – https://fitfoodiefinds.com/6-baked-chicken-breast-recipes/
  11. 40 Side Dishes For Chicken The Whole Family Will Love – https://www.southernliving.com/food/side-dishes/side-dishes-for-chicken
  12. 30 Side Dishes to Serve with Fried Chicken – https://www.tasteofhome.com/collection/side-dishes-for-fried-chicken/
  13. Best Damn Oven Baked Chicken Breast – https://recipeteacher.com/best-damn-oven-baked-chicken-breast/
  14. Stress-Free Baked Chicken Breasts (Super-Juicy) – https://familystylefood.com/baked-chicken-breasts/

Tasty Pico de Gallo Recipes: Fresh & Flavorful

pico de gallo recipes

Discover mouthwatering pico de gallo recipes that bring a burst of fresh flavors to your table. Learn how to make this zesty Mexican salsa for your next fiesta!

Pico de gallo is a classic Mexican fresh salsa. It’s made with ripe tomatoes, onion, cilantro, jalapeño, and lime. This condiment can make any dish better, from tortilla chips to tacos and enchiladas. Our pico de gallo recipes will make your taste buds dance with joy.

pico de gallo recipes

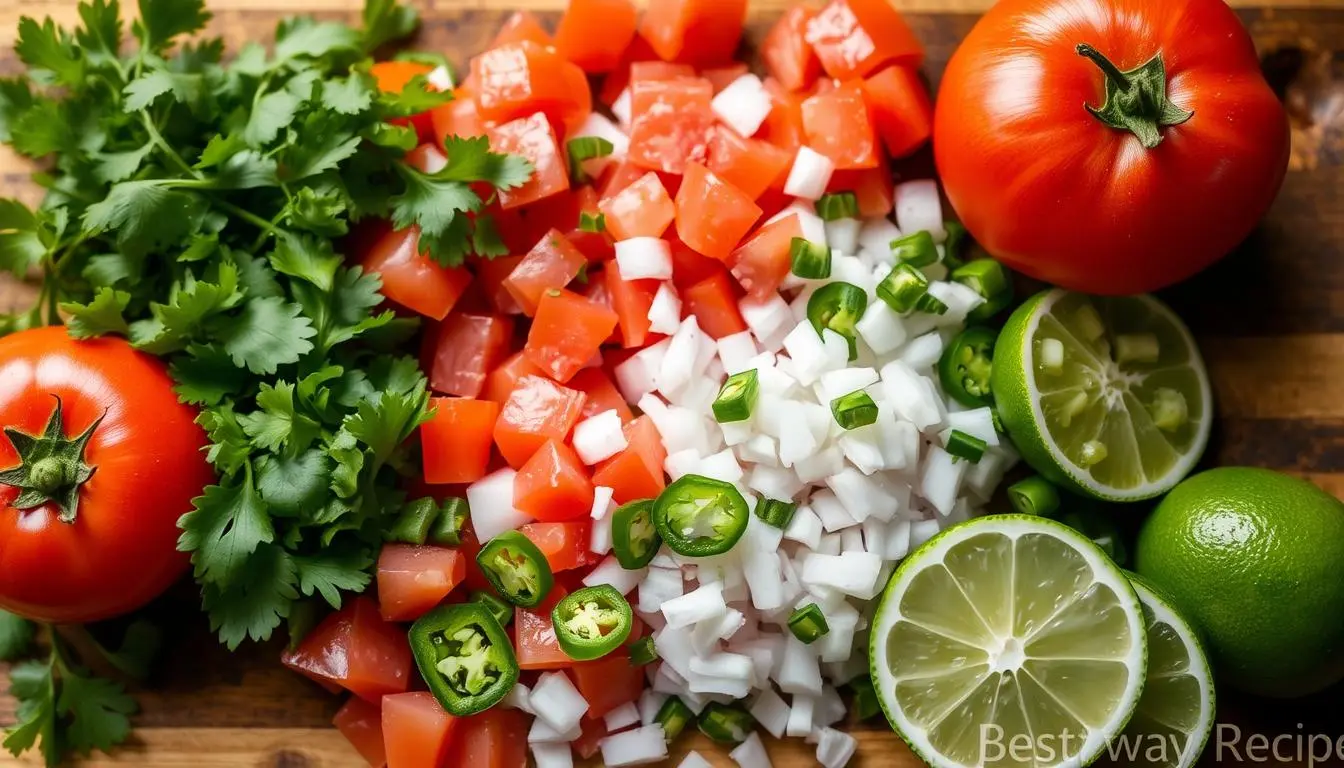
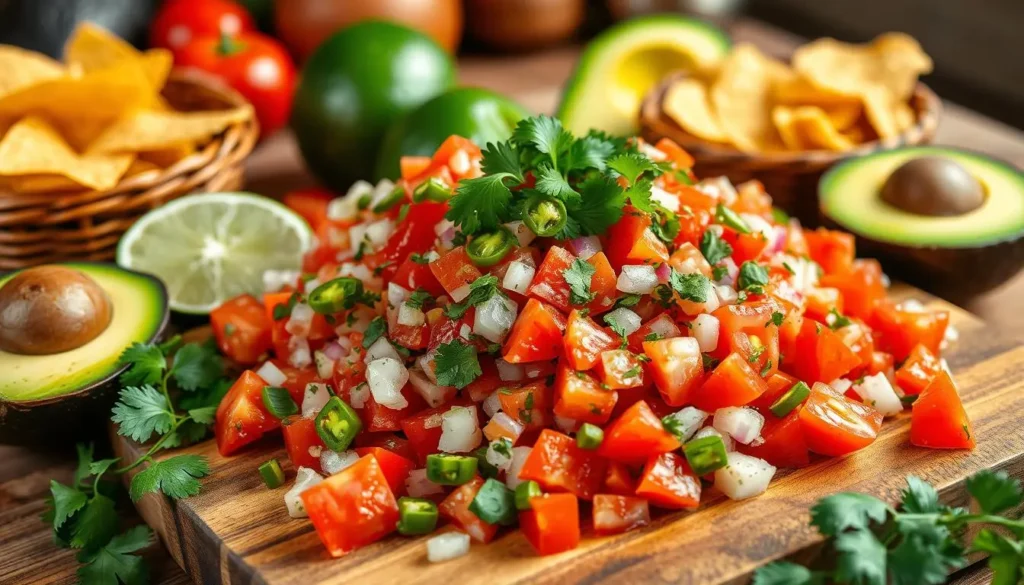
Fresh pico de gallo ingredients arranged beautifully: ripe tomatoes, finely chopped onions, vibrant cilantro, diced jalapeños, and zesty lime wedges, all on a rustic wooden cutting board, with a colorful, fresh look, bestwayrecipes.

Key Takeaways

  • Pico de gallo is a fresh Mexican salsa made with chopped tomatoes, onion, cilantro, jalapeño, and lime juice.
  • It can be enjoyed as a dip with tortilla chips or used as a topping for Mexican dishes like tacos, enchiladas, and nachos.
  • The recipe is quick and easy to prepare, with a total time of just 15 minutes.
  • Pico de gallo is a vegan and gluten-free dish that serves 6 to 8 people.
  • Leftover pico de gallo can be stored in the fridge for up to 3 days.

What is Pico de Gallo?

The Difference Between Pico de Gallo recipes and Salsa

Pico de gallo, also known as salsa fresca or salsa cruda, is a fresh Mexican salsa. It’s different from other salsas in a few key ways. First, it’s made with fresh ingredients that aren’t cooked. Second, the ingredients are finely diced, not blended or mashed.

The main ingredients are ripe tomatoes, onion, cilantro, jalapeño, garlic, lime juice, and salt. Unlike traditional salsa, pico de gallo doesn’t get blended. This makes it thicker and more chunky.

Pico de gallo is made with a 2:1 tomato to onion ratio, as the author likes. The recipe calls for 2 tomatoes, 1/2 white onion, 1 jalapeño, 1 lime, 1/4 cup chopped cilantro, and 1/4 tsp salt. The flavors improve as the ingredients marinate in tomato and lime juice, reaching peak flavor in 2-24 hours.

The nutritional info for a serving of pico de gallo is about 7 calories, 2g carbs, 0.3g protein, 0.1g fat, 50mg sodium, and 0.4g fiber.

While you can serve pico de gallo right away, it’s better to refrigerate it for up to three days. You can also add pineapple, avocado, corn, mango, peaches, and chipotle peppers to the basic recipe. It’s great with tacos, enchiladas, nachos, and more.

“Authentic Pico de Gallo highlights the flavors of tomatoes, which are the main ingredient.”

Authentic Pico de Gallo Ingredients

Pico de Gallo, also known as salsa bandera, looks like the Mexican flag. It has red, white, and green colors. To make it, you need fresh ingredients like ripe tomatoes, white onion, cilantro, and chili peppers.

Choose Roma, plum, or on-the-vine tomatoes for less juice and seeds. Use a white onion, but yellow or sweet onions work too. Serrano peppers are authentic, but jalapeños are okay if you like it milder.

Cucumbers are a key part of Pico de Gallo, even though many don’t know. Let it chill in the fridge for at least 20 minutes to blend flavors. Add salt and pepper slowly to avoid too much seasoning.

IngredientQuantity
Roma Tomatoes5 ripe
White Onion1/2 small
Jalapeño (or Serrano)1
Fresh Cilantro2 tablespoons, finely minced
Lime JuiceJuice from 1/2 lime
pico de gallo recipes

Pico de Gallo is great with many dishes, like ketchup in American food. Use fresh roma tomatoes and let it marinate for 15 minutes for the best taste. Serve it with tortilla chips or on tacos, nachos, or enchiladas. Use a slotted spoon to avoid too much liquid.

The recipe includes tomatoes, white onion, jalapeño, cucumber, cilantro, lime juice, salt, and pepper. Each serving has 1kcal, 0.2g carbs, 0.03g protein, and 0.01g fat. It also has 0.003g saturated fat, 0.01g polyunsaturated fat, 0.1mg sodium, 9mg potassium, 0.1g fiber, 0.1g sugar, 38IU vitamin A, 4mg vitamin C, 0.4mg calcium, and 0.01mg iron.

“Pico de Gallo is a versatile sauce that can be enjoyed in a variety of ways, much like how ketchup is used in American cuisine.”

How to Make Pico de Gallo Recipes

Making the perfect pico de gallo is easy. You just need a cutting board and a sharp knife. Start by chopping fresh, ripe tomatoes, onions, cilantro, and jalapeño. Make sure to remove the seeds and membranes from the jalapeño for a milder salsa. Then, mix the chopped ingredients with minced garlic, lime juice, and a pinch of salt.

For the best taste, let the pico de gallo sit for at least 20 minutes before serving. To avoid a watery salsa, use only the tomato flesh. Chilling the salsa for an hour or more will enhance the flavors.

pico de gallo recipes

A vibrant and colorful composition of a fresh pico de gallo recipe, featuring diced tomatoes, onions, cilantro, jalapeños, and lime on a rustic wooden cutting board surrounded by fresh ingredients like avocados and tortilla chips, beautifully arranged to showcase the freshness and flavor, with a warm, inviting kitchen background –v 5 –ar 16:9 –q 2 –style 4a bestwayrecipes

  • Ripe, firm plum tomatoes, diced
  • White onion, finely chopped
  • Fresh cilantro, stems and all, chopped
  • Jalapeño, seeds and membranes removed, finely chopped
  • Minced garlic
  • Fresh lime juice
  • Salt to taste

The homemade Pico de Gallo recipe is quick, taking just 10 minutes to make. It makes about 4 cups of fresh, flavorful salsa. You can store it in the fridge for up to 5 days, making it a great topping or dip.

Nutrition Facts (per serving)Value
Calories19kcal
Carbohydrates4g
Protein1g
Fat1g
Saturated Fat1g

The homemade Pico de Gallo recipe has a 4.94 out of 5 rating from 48 votes. It’s a classic favorite. Enjoy it with tortilla chips, as a topping for tacos or burgers, or as a fresh garnish. Pico de gallo will add vibrant flavors to any dish.

pico de gallo recipes: Variations and Serving Suggestions

The classic pico de gallo recipe is a mix of fresh tomatoes, crisp white onions, and fragrant cilantro. You can easily change it to fit your taste and needs. There are many ways to make pico de gallo, from sweet fruit versions to creative toppings.

Want something sweet? Use diced mango, pineapple, watermelon, peaches, or strawberries instead of tomatoes. These fruits add a juicy sweetness that goes well with the savory onion, jalapeño, and lime. For extra crunch, add diced red bell pepper or fresh corn kernels.

For more heat, add a pinch of ground cumin or coriander. Adjust the jalapeño or serrano peppers to your liking. You can also make it creamier by adding avocado or black beans.

Pico de gallo is great not just as a dip but also as a topping for Mexican dishes. Try it on tacos, enchiladas, nachos, or burritos for a fresh taste. It’s also good on scrambled eggs or breakfast burritos.

Whether you stick to the original recipe or try new ones, pico de gallo is a tasty addition to any meal. So, feel free to get creative and find your favorite way to enjoy this vibrant salsa.

pico de gallo recipes

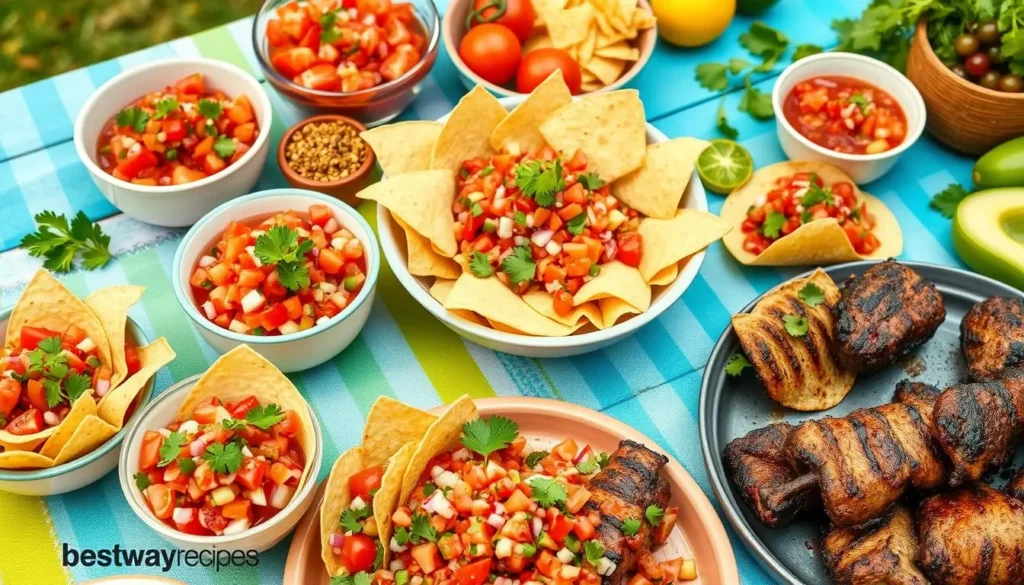
A vibrant and colorful spread showcasing various serving ideas for pico de gallo, including bowls of fresh pico de gallo garnished with herbs, tortilla chips surrounding a large bowl, tacos filled with pico de gallo, and a platter featuring grilled meats topped with the salsa. The setting is a festive outdoor picnic table adorned with bright tableware and fresh ingredients like tomatoes, onions, and cilantro. Include the brand name “bestwayrecipes” subtly in the design.

Conclusion

Pico de gallo recipes is a simple, fresh, and flavorful Mexican salsa that everyone should try. It’s made with just a few ingredients like tomatoes, onions, cilantro, and jalapeños. These ingredients come together to make a zesty, chunky salsa that can brighten up many dishes.

Enjoy it as a dip, a topping for tacos and burritos, or mixed into eggs. Pico de gallo is a versatile and delicious addition to your meals. If you store it properly, it can last up to 2 days in the fridge.

Try these tasty pico de gallo recipes and enjoy the fresh flavors that make it a favorite. Ferment it for 5-7 days to get the perfect sourness and flavor. Use 3 tablespoons of salt per 2 pounds of vegetables for a balanced taste.

Pico de gallo recipes is not only delicious but also packed with nutrients like vitamins, minerals, and antioxidants. It’s a healthy addition to your diet.

In summary, pico de gallo is a versatile Mexican salsa that can make any dish better with its fresh, zesty flavors. Whether you’re a seasoned salsa lover or new to Mexican cuisine, these recipes are a must-try. Enjoy the burst of flavors and versatility that pico de gallo offers, and make it a regular part of your cooking.

FAQ

What is pico de gallo recipes?

Pico de gallo is a fresh Mexican salsa. It’s made with chopped tomatoes, onion, cilantro, jalapeño, and lime. You can use it as a dip or a topping for Mexican dishes.

What is the difference between pico de gallo and salsa?

Pico de gallo is different from traditional salsa. It’s made with fresh, diced ingredients. Salsa, on the other hand, is blended, making it more liquid.

What are the key ingredients in authentic pico de gallo?

The main ingredients are ripe tomatoes, white onion, cilantro, jalapeño, garlic, lime juice, and salt.

How do you make pico de gallo?

To make pico de gallo, chop the tomatoes, onion, cilantro, and jalapeño finely. Then, mix them with garlic, lime juice, and a bit of salt.

How can you customize pico de gallo?

You can change up the recipe by using mango, pineapple, watermelon, peaches, or strawberries for a sweet twist. Adding red bell pepper or fresh corn gives extra crunch. Avocado or black beans also go well with it.

How can you serve pico de gallo?

Pico de gallo is great as a dip or a topping. It’s perfect for tacos, enchiladas, nachos, burritos, and more. It also adds flavor to breakfast items like scrambled eggs or burritos.

  1. Pico De Gallo – Love and Lemons – https://www.loveandlemons.com/pico-de-gallo/
  2. Easy Pico de Gallo Recipe – Budget Bytes – https://www.budgetbytes.com/pico-de-gallo/
  3. Pico de Gallo Mexican Salsa Recipe – https://www.holajalapeno.com/pico-de-gallo/
  4. The Secret Ingredient to the BEST PICO DE GALLO — Mer and Meg’s Escapades – https://www.merandmegsescapades.com/blog/pico-de-gallo
  5. Authentic Pico de Gallo – https://www.acozykitchen.com/authentic-pico-de-gallo
  6. Pico de Gallo – https://www.tasteofhome.com/recipes/pico-de-gallo/
  7. Easy Pico de Gallo – Tastes Better From Scratch – https://tastesbetterfromscratch.com/pico-de-gallo/
  8. Authentic Pico de Gallo – https://tarateaspoon.com/authentic-pico-de-gallo/
  9. Pico de Gallo – https://www.lanascooking.com/pico-de-gallo/
  10. Fresh Pico de Gallo Recipe – https://grilling24x7.com/fresh-pico-de-gallo-recipe/

  11. Fermented Pico de Gallo: Boost Flavor and Gut Health – Happy Sashimi – https://www.eathappysashimi.com/fermented-pico-de-gallo/

Tasty Healthy Breakfast Curry Recipe for Energy

Healthy Breakfast Curry Recipe

Kickstart your day with a nutritious and flavorful healthy breakfast curry recipe. Packed with protein and veggies, this quick and easy dish will energize your mornings.

As the sun rises, the air fills with the scent of spices and cooking vegetables. This invites you to begin your day with a flavorful and nutritious meal. The healthy breakfast curry is here to offer both taste and energy for your day.

This Indian-inspired breakfast curry is a fresh take on morning meals. It combines bold flavors with health benefits. You can choose from vegan, vegetarian, or high-protein options. This dish is full of carbs, vitamins, minerals, and antioxidants, making you feel energized and full without the mid-morning crash.

Healthy Breakfast Curry Recipe

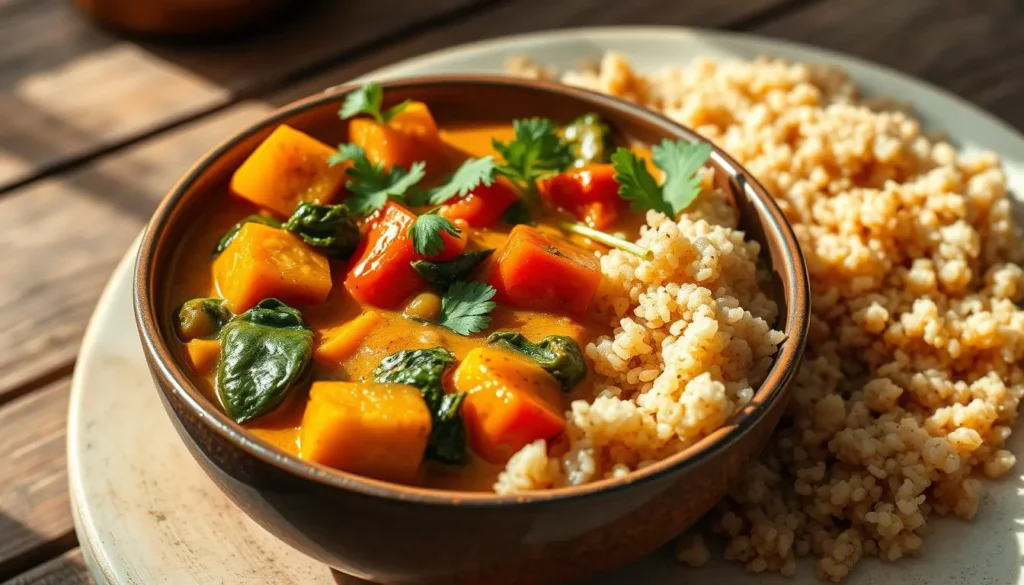
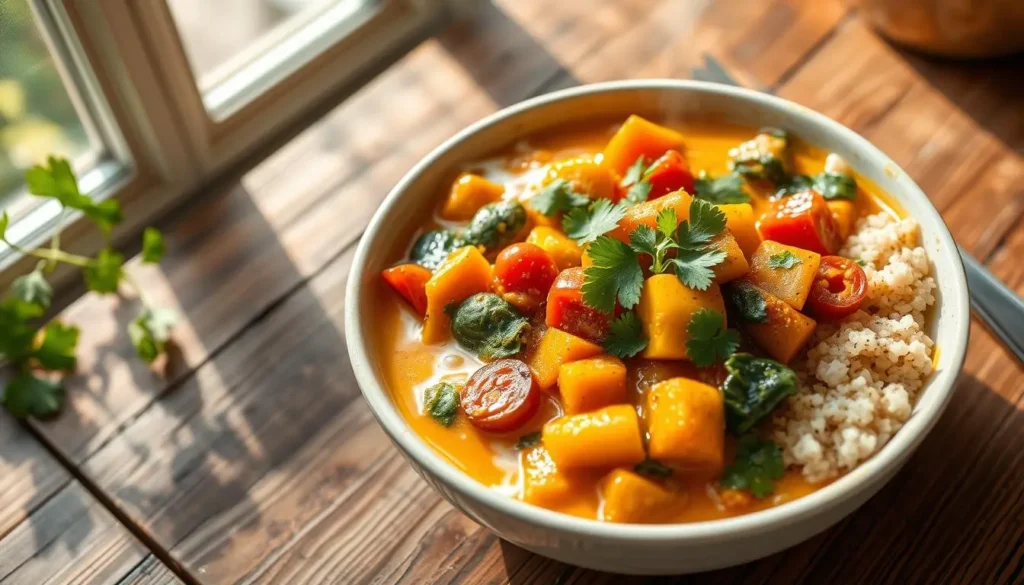
A vibrant and colorful bowl of healthy breakfast curry, featuring a medley of vegetables like spinach, bell peppers, and tomatoes, with golden turmeric and fragrant spices. Garnished with fresh cilantro and served alongside fluffy quinoa, all set on a rustic wooden table with natural morning light illuminating the scene.

Key Takeaways

  • Healthy breakfast curries provide sustained energy from complex carbs, proteins, and healthy fats
  • They are rich in vitamins, minerals, and antioxidants from fresh vegetables and aromatic spices
  • Customizable recipes allow for vegan, vegetarian, or high-protein variations
  • Breakfast curries can be prepared in advance for a convenient, grab-and-go morning meal
  • Pairing the curry with complementary sides like rice, naan, or a salad enhances the meal’s nutritional value

What is a Breakfast Curry?

breakfast curry is a tasty and nutritious dish. It mixes Indian cuisine with the need for energizing morning meals. It’s filled with spices, veggies, and protein to keep you going all day.

Spice Up Your Mornings

The key to a great breakfast curry is its spices. Turmeric, cumin, coriander, and ginger add flavor and health benefits. These spices make your taste buds happy and help your body stay healthy.

Vegetable-Packed Nourishment

A healthy breakfast curry also has lots of veggies. Leafy greens, bell peppers, and more give you vitamins and antioxidants. They make you feel full and energized in the morning.

Protein-Powered Sustenance

To make it a complete meal, a healthy breakfast curry has protein. This can be lean meats, eggs, tofu, or chickpeas. Protein keeps your energy up and stops you from feeling tired in the morning.

Whether you like a traditional Indian-style breakfast curry or a modern flavorful morning curry, it’s a great choice. It’s a tasty and healthy breakfast to start your day.

Benefits of a healthy breakfast curry recipe

Starting your day with a nourishing breakfast curry offers many benefits. This dish gives you sustained energy. It has complex carbs, proteins, and healthy fats. Plus, it’s full of vitamins, minerals, and antioxidants from the veggies and spices.

  • Sustained Energy: The mix of complex carbs, proteins, and healthy fats in a breakfast curry keeps your blood sugar stable. It gives you long-lasting energy for the morning.
  • Nutrient-Dense Nourishment: This nutrient-dense morning curry is full of essential vitamins, minerals, and antioxidants. It supports your health and well-being.
  • Satisfying and Energizing: The energy-boosting breakfast curry makes you feel full and energized for hours. This is thanks to its balanced macronutrients.
NutrientAmount per Serving
Protein14g
Carbohydrates40g
Fiber10g
Fats10g
Iron25% DV

Adding a wholesome healthy breakfast curry to your morning is great. It nourishes your body and gives you energy and vitality for the day.

Healthy Breakfast Curry Recipe

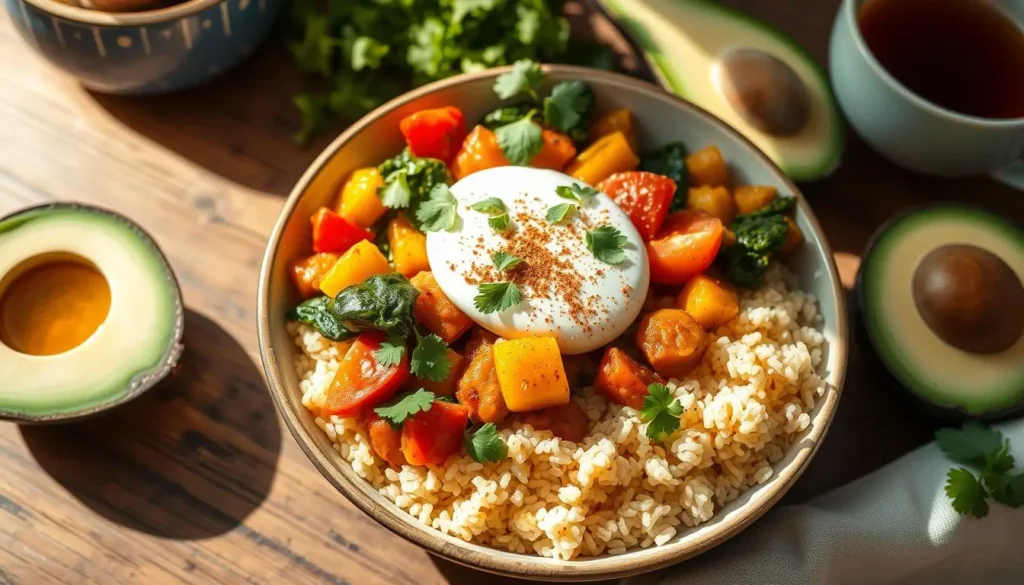
A vibrant and colorful bowl of healthy breakfast curry, featuring a mix of sautéed vegetables like spinach, bell peppers, and tomatoes, with fluffy quinoa or brown rice at the base. Garnished with fresh herbs such as cilantro and a sprinkle of spices like turmeric and cumin. The scene is bright and inviting, set on a rustic wooden table with natural light highlighting the textures and colors of the ingredients. Include a side of sliced avocado and a cup of herbal tea for a fresh morning vibe.

Key Ingredients for an Energizing Breakfast Curry

To make a nourishing breakfast curry, start with aromatic spices like cuminturmeric, and garam masala. These add depth and complexity. Then, add nutrient-dense veggies like spinachbell peppers, and onions. They’re full of vitamins, minerals, and antioxidants.

For protein, use chickpeaslentils, or tofu. These plant-based proteins make the curry filling and boost energy. Add creamy fats from coconut milk or avocado for richness and creaminess.

IngredientNutritional Benefits
CuminDigestive aid, anti-inflammatory properties
TurmericAnti-inflammatory, antioxidant-rich
Garam MasalaWarming spices, enhances flavor
SpinachHigh in vitamins A, C, and K, as well as folate and iron
Bell PeppersRich in vitamins C and B6, plus antioxidants
OnionsContain sulfur compounds with anti-inflammatory benefits
ChickpeasExcellent source of plant-based protein and fiber
LentilsHigh in protein, fiber, and complex carbohydrates
TofuProvides soy-based protein and beneficial isoflavones
Coconut MilkAdds creaminess and healthy fats
AvocadoRich in monounsaturated fats and antioxidants

With these ingredients, you can make a healthy breakfast curry. It’s delicious, energizing, and packed with nutrients to start your day right.

healthy breakfast curry recipe: Step-by-Step Guide

Learn to make a delicious and healthy breakfast curry at home. You can choose from vegan, vegetarian, or protein-packed options. This guide will show you how to make a breakfast curry that’s great for starting your day.

Making a Healthy Breakfast Curry

Start by heating a tablespoon of coconut oil or ghee in a large skillet. Use medium heat. Add spices like turmeric, cumin, coriander, and ginger. Let them sizzle and fill the air with their scent.

Then, sauté diced onions until they’re clear. Add minced garlic and ginger for extra flavor. Add diced veggies like spinach, potatoes, and chickpeas. Cook them until they’re tender but still firm.

  1. For a vegan or vegetarian curry, use coconut milk instead of dairy. You can also add lentils or roasted sweet potatoes for more protein and fiber.
  2. To boost the protein, top it with sautéed shrimp, grilled chicken, or a soft-boiled egg.

Season with salt, pepper, and a squeeze of lemon or lime juice. Serve over fluffy basmati rice or with warm naan bread for a full meal.

Nutrition Facts (per serving)Amount
Calories250 kcal
Sugar5g
Sodium180mg
Fat8g
Saturated Fat5g
Unsaturated Fat3g
Carbohydrates35g
Fiber8g
Protein10g
Cholesterol140mg

Enjoy your homemade healthy breakfast curry and start your day with a nourishing meal!

Healthy Breakfast Curry Recipe

A vibrant bowl of healthy breakfast curry featuring a mix of colorful vegetables like bell peppers, spinach, and tomatoes, with a creamy coconut milk base, garnished with fresh herbs like cilantro and a sprinkle of spices. The dish is steaming, served alongside fluffy quinoa or brown rice on a rustic wooden table, with sunlight pouring in from a nearby window.

Pairing Your Breakfast Curry with Complementary Sides

To make a complete breakfast, pair your curry with various sides. This enhances flavors and textures and adds nutrients. It’s a great way to start your day.

Basmati rice is a classic choice, letting the curry shine. Whole-grain naan or roti adds a hearty touch. Naan, roti, and paratha are favorites in Indian cuisine, each with its own taste and texture.

A cool raita, made with yogurt and veggies, can cool down spicy curries. A fresh green salad also adds a crunchy, nutritious touch.

Try different sides to serve with breakfast currycomplementary dishes for curry breakfast, and breakfast curry pairings. This makes your breakfast not just tasty but also healthy and satisfying.

FlatbreadTextureNutritional Profile
NaanSoft and chewyHigher in carbohydrates and fat
RotiFirm and wholesomeMade from whole wheat flour, higher in fiber
ParathaFlaky and butteryRicher in texture and calories

Try different sides to serve with breakfast curry to find your favorite. The options are endless for a delicious and balanced breakfast with your curry.

Make-Ahead and Meal Prep Ideas for Breakfast Curries

For busy mornings, think about making your make-ahead breakfast curry recipe ahead of time. This saves you time and effort. You can then enjoy a healthy and tasty easy curry breakfast without the daily stress.

Prepare the Curry Base Ahead of Time

Begin by making the curry base early. Cook the onions, spices, and other ingredients. Then, store the mix in the fridge for up to 4 days or freeze it for months. When you’re ready, just reheat the base and add fresh veggies and protein.

Batch Cook on the Weekend

Batch cooking on the weekend is a smart move. It lets you add more vegan breakfast curries or high-protein breakfast curries to your diet. Portion out servings and keep them in the fridge or freezer. This makes mornings easy with quick grab-and-go options all week.

With these meal prep tips for curry breakfast, you can save time. Enjoy a nutritious, flavorful make-ahead breakfast curry any day of the week.

Conclusion

Kickstart your day with a burst of flavor and nourishment by trying a healthy breakfast curry recipe. This dish not only tastes great but also gives you energy to tackle the day. You can make it vegan, vegetarian, or high in protein, depending on what you like.

A healthy breakfast curry is a tasty and nutritious dish that mixes Indian cuisine with a modern twist for morning meals. It’s packed with aromatic spices, healthy veggies, and protein to energize you for the day.

Starting your day with a nourishing breakfast curry offers many benefits, including sustained energy levels and a nutrient-dense meal. With simple ingredients and straightforward stepsyou can easily make a tasty and healthy breakfast curry at homewith options to customize it to your dietary preferences. Pair your curry with complementary sides and prepare it in advance for a convenient and energizing start to your day.

Kickstarting your day with a healthy breakfast curry is a delicious and nourishing way to fuel your body and mind. By incorporating aromatic spices, nutrient-rich vegetables, and protein sources, you can create a satisfying and energizing meal that sets the tone for a productive and vibrant day ahead. Whether you prefer a vegan, vegetarian, or high-protein version, a healthy breakfast curry is a versatile and flavorful choice that can become a new staple in your morning routine.

FAQ

What is a healthy breakfast curry?

A healthy breakfast curry is a dish full of flavor. It has veggies and protein for energy all morning.

What are the benefits of a healthy breakfast curry recipe?

Starting your day with a breakfast curry boosts your energy. It has carbs, proteins, and fats for lasting energy. Plus, it’s full of vitamins, minerals, and antioxidants from veggies and spices.

What are the key ingredients for an energizing breakfast curry?

The main ingredients for a breakfast curry are spices like cumin, turmeric, and garam masala. It also includes nutritious veggies and proteins like chickpeas, lentils, or lean meat.

How do I make a healthy breakfast curry at home?

Follow a simple guide to make a tasty and breakfast curry at home. You can choose from vegan, vegetarian, or high-protein options.

What sides can I serve with a breakfast curry?

Pair your breakfast curry with sides like fluffy basmati rice or whole-grain naan or roti. A cool raita or fresh green salad also makes a great meal.

Can I make a breakfast curry in advance?

Yes, you can prepare your breakfast curry recipe in advance. Use make-ahead and meal prep tips for busy mornings. Cook the curry base ahead and reheat it with fresh ingredients.

Easy Cottage Cheese Wrap Recipe for a Healthy Snack or Meal

Easy Cottage Cheese Wrap Recipe

Discover a simple and delicious cottage cheese wrap recipe, perfect for a quick, healthy snack or meal. Ready in minutes and packed with flavor!

Cottage Cheese Wrap Recipe

Are you tired of the same old lunch routine? 🥱 Looking for a quick, healthy, and delicious meal that’ll keep you satisfied until dinner? Look no further than the cottage cheese wrap! This versatile and protein-packed dish is taking the internet by storm, and for good reason.

Imagine biting into a soft tortilla filled with creamy cottage cheese, fresh veggies, and your favorite toppings. 😋 Not only is it incredibly tasty, but it’s also customizable to fit your dietary needs and preferences. Whether you’re a busy professional, a fitness enthusiast, or just someone who loves good food, the cottage cheese wrap is about to become your new go-to meal.

In this blog post, we’ll dive into the world of cottage cheese wraps recipe, exploring exciting filling ideas, essential ingredients, and answering your burning questions. You’ll also discover some trending recipes and learn how to make the viral cottage cheese wrap that’s been all over social media. So, grab your apron and get ready to revolutionize your lunch game!

Filling ideas for your cottage cheese wrap

Filling Ideas for Your Cottage Cheese Wrap Recipe

Now that you’ve decided to try the delicious and nutritious cottage cheese wrap, let’s explore some exciting filling ideas to take your wrap to the next level. These creative combinations will not only tantalize your taste buds but also provide a perfect balance of flavors and textures. Whether you’re looking for a quick snack, a high-protein lunch, or a low-carb meal option, these filling ideas will surely inspire you.

Classic Veggie Delight

You can never go wrong with a classic veggie combination. Here’s how to create a refreshing and crunchy cottage cheese wrap recipe:

  1. Spread a layer of cottage cheese on your wrap
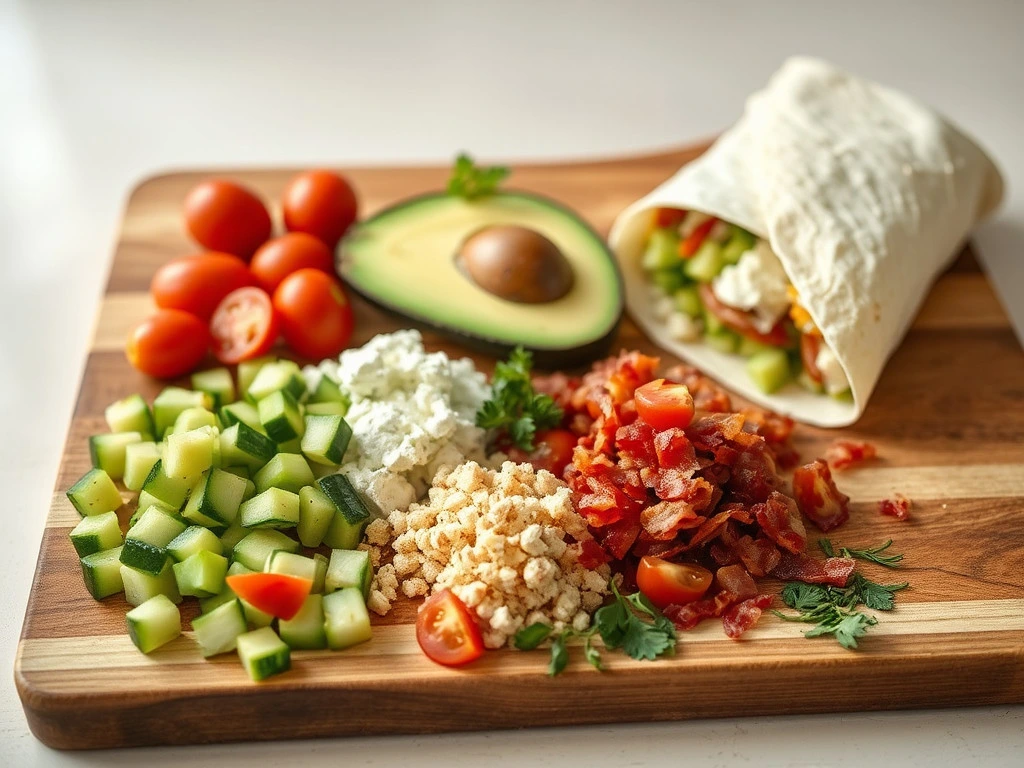
  2. Add sliced cucumbers, cherry tomatoes, and thinly sliced red onions
  3. Sprinkle some fresh dill or chives
  4. Finish with a squeeze of lemon juice for a zesty kick

This combination not only adds a delightful crunch but also provides essential vitamins and minerals. The fresh herbs elevate the flavor profile, making it a perfect choice for a light summer lunch.

Protein-Packed Power Wrap

For those days when you need an extra boost of energy, try this protein-packed filling:

  1. Mix cottage cheese with mashed avocado for a creamy base
  2. Add sliced grilled chicken or turkey breast
  3. Toss in some spinach leaves and sliced hard-boiled eggs
  4. Sprinkle with chia seeds or hemp hearts for added nutrition

This high-protein wrap is perfect for post-workout refueling or as a satisfying lunch option. The combination of cottage cheese and avocado creates a rich, creamy texture that complements the lean protein sources.

Mediterranean Inspired Wrap

Transport your taste buds to the Mediterranean with this flavorful filling:

  1. Spread cottage cheese mixed with a touch of olive oil
  2. Add chopped kalamata olives, diced tomatoes, and cucumber
  3. Sprinkle with crumbled feta cheese and oregano
  4. Drizzle with a bit of balsamic glaze for a sweet and tangy finish

This wrap combines the freshness of Mediterranean ingredients with the creaminess of cottage cheese, creating a delightful fusion of flavors. It’s a perfect option for those looking to add some international flair to their lunch routine.

Sweet and Savory Breakfast Wrap

Who says wraps are just for lunch? Start your day right with this sweet and savory breakfast filling:

  1. Mix cottage cheese with a drizzle of honey
  2. Add sliced strawberries and banana
  3. Sprinkle with granola or chopped nuts for added crunch
  4. Dust with cinnamon for a warm, comforting flavor

This breakfast wrap is a great way to kickstart your morning with a balance of protein, fiber, and natural sweetness. It’s also an excellent option for meal prep – simply assemble in the morning for a quick and easy breakfast on-the-go.

Spicy Southwest Wrap

For those who like a bit of heat, try this zesty Southwest-inspired filling:

  1. Mix cottage cheese with a small amount of taco seasoning
  2. Add black beans, corn, and diced bell peppers
  3. Sprinkle with shredded cheddar cheese
  4. Top with a dollop of salsa or pico de gallo

This wrap packs a flavorful punch while still maintaining the health benefits of cottage cheese. It’s a great way to satisfy your craving for Mexican food in a lighter, more nutritious package.

Comparison of Nutritional Benefits

To help you make the best choice for your dietary needs, here’s a comparison of the nutritional benefits of each filling idea:

Filling IdeaProteinFiberHealthy FatsVitamins & Minerals
Classic VeggieMediumHighLowHigh
Protein-PackedHighMediumMediumMedium
MediterraneanMediumMediumMediumHigh
BreakfastMediumMediumMediumMedium
SouthwestHighHighLowMedium

Tips for Perfect Cottage Cheese Wraps

To ensure your cottage cheese wrap recipe are always delicious and satisfying, keep these tips in mind:

  1. Choose the right wrap: Opt for whole grain or low-carb wraps for added nutrition.
  2. Drain excess liquid: If your cottage cheese is watery, drain it slightly to prevent soggy wraps.
  3. Layer wisely: Place drier ingredients next to the wrap to act as a barrier against moisture.
  4. Don’t overfill: Leave room to fold and seal your wrap properly.
  5. Experiment with seasonings: Try different herbs and spices to customize your wrap’s flavor profile.

Meal Prep and Storage

Cottage cheese wraps are excellent for meal prep. Here’s how you can prepare them in advance:

  1. Prepare fillings separately and store in airtight containers.
  2. Keep cottage cheese in a separate container to prevent sogginess.
  3. Assemble wraps just before eating for optimal freshness.
  4. If preparing fully assembled wraps, wrap tightly in plastic wrap or aluminum foil.
  5. Store in the refrigerator for up to 3 days.

By prepping your ingredients in advance, you can easily create quick and nutritious meals throughout the week.

With these filling ideas and tips, you’re now ready to create delicious and healthy cottage cheese wraps that suit your taste preferences and nutritional needs. Whether you’re looking for a quick snack, a protein-packed lunch, or a low-carb meal option, these versatile wraps have got you covered. Next, we’ll dive into the essential ingredients you’ll need to stock up on for your cottage cheese wrap recipe adventures.

Ingredients you’ll need for cottage cheese wrap recipe

Ingredients you’ll need for cottage cheese wrap recipe

Now that we’ve explored some exciting filling ideas, let’s dive into the essential ingredients you’ll need to create your perfect cottage cheese wrap. This versatile and nutritious meal is not only easy to prepare but also customizable to suit your taste preferences and dietary needs. Here’s a comprehensive list of ingredients to help you craft your ideal cottage cheese wrap recipe.

Core Ingredients

  1. Cottage Cheese: The star of the show, cottage cheese is a protein-packed, low-fat dairy product that forms the base of your wrap. Opt for a high-quality, creamy variety for the best texture and flavor.
  2. Wrap or Tortilla: Choose from a variety of options such as whole wheat, spinach, or low-carb alternatives like lettuce wraps for a keto-friendly version.
  3. Vegetables: Fresh, crisp veggies add texture, nutrients, and flavor to your wrap. Some popular choices include:
    • Lettuce
    • Tomatoes
    • Cucumbers
    • Bell peppers
    • Carrots
    • Spinach
  4. Herbs and Spices: Enhance the flavor profile of your wrap with fresh herbs or dried spices. Consider:
    • Fresh basil
    • Cilantro
    • Dill
    • Garlic powder
    • Onion powder
    • Paprika

Optional Add-ins

To elevate your cottage cheese wrap and make it even more satisfying, consider these optional ingredients:

  1. Protein Boosters:
    • Grilled chicken
    • Turkey slices
    • Smoked salmon
    • Hard-boiled eggs
  2. Healthy Fats:
    • Avocado
    • Nuts (chopped almonds, walnuts, or pecans)
    • Seeds (sunflower, pumpkin, or chia seeds)
  3. Fruit for Sweetness:
    • Diced apples
    • Sliced strawberries
    • Grapes
    • Dried cranberries
  4. Flavor Enhancers:
    • Lemon juice
    • Balsamic vinegar
    • Hot sauce
    • Mustard

To help you get started, here are some popular cottage cheese wrap recipe variations and their key ingredients:

Wrap VariationKey Ingredients
MediterraneanCottage cheese, whole wheat wrap, cucumber, tomatoes, olives, fresh dill
SouthwesternCottage cheese, spinach wrap, bell peppers, corn, black beans, cilantro
Sweet and SavoryCottage cheese, whole grain wrap, sliced apples, walnuts, cinnamon
High ProteinCottage cheese, low-carb wrap, grilled chicken, spinach, avocado
Veggie DelightCottage cheese, lettuce wrap, mixed vegetables, sunflower seeds, balsamic glaze

Tips for Selecting and Preparing Ingredients

  1. Choose fresh, high-quality ingredients: The fresher your ingredients, the more delicious and nutritious your wrap will be.
  2. Prep ingredients in advance: Wash and chop vegetables, cook proteins, and prepare any sauces or dressings ahead of time for quick assembly.
  3. Drain cottage cheese: If your cottage cheese is too watery, drain it in a fine-mesh strainer to prevent a soggy wrap.
  4. Customize to dietary needs: Select gluten-free wraps for celiac or gluten-sensitive individuals, or use lettuce wraps for a low-carb option.
  5. Balance flavors and textures: Aim for a mix of creamy (cottage cheese), crunchy (vegetables), and savory or sweet (herbs, spices, or fruits) elements in your wrap.

Nutritional Considerations

When selecting ingredients for your cottage cheese wrap recipe, keep these nutritional aspects in mind:

  • Protein: Cottage cheese is an excellent source of protein, but you can boost it further with lean meats or plant-based proteins like chickpeas.
  • Fiber: Incorporate whole grain wraps and plenty of vegetables to increase fiber content, promoting digestive health and satiety.
  • Healthy Fats: Add avocado, nuts, or seeds for heart-healthy fats that also enhance flavor and texture.
  • Vitamins and Minerals: A variety of colorful vegetables ensures a wide range of essential nutrients in your wrap.

Ingredient Portions

To create a well-balanced cottage cheese wrap, use these approximate portions as a guide:

  • 1/2 cup cottage cheese
  • 1 medium-sized wrap or tortilla
  • 1 cup mixed vegetables
  • 1-2 tablespoons herbs or spices
  • 2-3 tablespoons protein add-ins (if using)
  • 1-2 tablespoons healthy fats (if using)

Remember, these portions can be adjusted based on your nutritional needs and preferences.

Storage and Meal Prep

If you’re planning to make cottage cheese wraps for meal prep, consider these tips:

  1. Store wet ingredients separately: Keep tomatoes, cucumbers, and other watery vegetables separate from the wrap to prevent sogginess.
  2. Use airtight containers: Store prepared ingredients in sealed containers in the refrigerator for up to 3-4 days.
  3. Assemble just before eating: For the best texture and freshness, assemble your wrap right before consumption.
  4. Freeze-friendly options: While cottage cheese doesn’t freeze well, you can prepare and freeze other components like grilled chicken or roasted vegetables for quick assembly later.

By having these ingredients on hand and understanding how to combine them, you’ll be well-equipped to create delicious, nutritious cottage cheese wraps that suit your taste and dietary needs. Experiment with different combinations to find your perfect wrap, and don’t be afraid to get creative with seasonal ingredients or leftovers from your fridge. Next, we’ll address some frequently asked questions about cottage cheese wraps to help you master this versatile and satisfying meal option.

FAQ- frequently asked questions

FAQ- Frequently Asked Questions

A. How many does this serve?

You might be wondering about the serving size of our delicious cottage cheese wrap recipe. The great news is that this recipe is incredibly flexible and can easily be adjusted to serve as many people as you need. Typically, one cottage cheese wrap serves one person as a satisfying meal. However, you can easily scale up the recipe to accommodate more servings.

Here’s a handy guide to help you plan your servings:

  • 1 wrap = 1 serving (perfect for a quick lunch or snack)
  • 2 wraps = 2 servings (ideal for a hearty meal or sharing with a friend)
  • 4 wraps = 4 servings (great for a small family or meal prep for the week)

Remember, the beauty of this cottage cheese wrap recipe lies in its customization. You can easily double or triple the ingredients to make more wraps without compromising on taste or quality. This makes it an excellent option for meal prepping or when you’re hosting a gathering.

B. How much protein is in the wrap?

If you’re looking for a protein-packed meal, you’re in luck with these cottage cheese wraps! The exact protein content can vary depending on the specific ingredients you choose and their quantities. However, let’s break down the typical protein content you can expect:

  1. Cottage Cheese: The star of the show, cottage cheese is a protein powerhouse. A 1/2 cup serving of cottage cheese typically contains about 12-14 grams of protein.
  2. Wrap: The protein content in the wrap itself can vary. A standard whole wheat wrap usually contains 3-5 grams of protein.
  3. Additional Fillings: Depending on your chosen fillings, you can boost the protein content even further. For example:
    • 1 oz of turkey or chicken breast can add about 7 grams of protein
    • 1/4 cup of black beans can contribute around 3-4 grams of protein
    • 1 oz of almonds or other nuts can add about 6 grams of protein

Here’s a sample protein breakdown for a typical cottage cheese wrap recipe:

IngredientProtein (g)
1/2 cup cottage cheese14
Whole wheat wrap4
1 oz turkey breast7
1/4 cup black beans3.5
Total28.5

As you can see, a well-constructed cottage cheese wrap can easily provide 25-30 grams of protein or more, making it an excellent choice for those looking to increase their protein intake. This high protein content helps keep you feeling full and satisfied, supports muscle growth and repair, and contributes to overall health and wellness.

C. How far in advance can I prepare this?

One of the best things about these cottage cheese wraps is their versatility when it comes to meal prep. You have a few options for preparing them in advance, depending on your preferences and schedule:

  1. Fully Assembled Wraps:
    • If you’re planning to eat the wraps within 24 hours, you can fully assemble them and store them in an airtight container in the refrigerator.
    • Wrap each assembled wrap tightly in plastic wrap or aluminum foil to prevent moisture from making the wrap soggy.
    • Consume within 1-2 days for the best taste and texture.
  2. Prepped Ingredients:
    • For optimal freshness, you can prep the ingredients separately and assemble the wraps just before eating.
    • Store the cottage cheese mixture (with any added herbs or seasonings) in an airtight container in the refrigerator for up to 3-5 days.
    • Chop and prepare any vegetables or other fillings and store them separately in the refrigerator for 2-3 days.
    • Keep the wraps in their original packaging or in a resealable bag at room temperature.
  3. Freezer-Friendly Option:
    • If you want to prep further in advance, you can freeze the cottage cheese mixture (without any raw vegetables) for up to 1 month.
    • Thaw in the refrigerator overnight before using.
    • Add fresh vegetables and assemble the wrap when you’re ready to eat.

Here are some tips to ensure your prepped cottage cheese wraps stay fresh and delicious:

  • If using ingredients that release moisture (like tomatoes or cucumbers), consider adding them just before eating to prevent the wrap from becoming soggy.
  • For meal prep, you can create a “wrap bar” with all the ingredients laid out separately. This allows you and your family members to customize your wraps throughout the week.
  • If you’re taking the wrap to work or school, pack any wet ingredients (like dressings or sauces) separately and add them just before eating.

Remember, food safety is crucial. Always store your prepped ingredients in the refrigerator and consume them within the recommended time frame. If you notice any off odors or appearance, it’s best to discard the ingredients and start fresh.

By preparing your cottage cheese wraps in advance, you’re setting yourself up for quick, easy, and nutritious meals throughout the week. Whether you’re a busy professional, a parent on the go, or simply someone who likes to plan ahead, these make-ahead options ensure you always have a healthy and delicious meal at your fingertips.

Now that you know how to serve, the protein content, and how to prep in advance, you’re well-equipped to make these cottage cheese wraps a regular part of your meal rotation. Next, we’ll explore some exciting variations and additional recipes that complement these wraps perfectly, allowing you to expand your healthy eating repertoire even further.

Easy Steak Nachos Recipe: Crowd-Pleasing Party Favorite

Steak Nachos Recipes

Discover how to make mouthwatering steak nachos recipe. Perfect for game day or parties, these loaded nachos will be a hit with any crowd.

My game days have never been the same since I learned how to mix steak and nachos. It was a cool Sunday afternoon when I first decided to put some grilled, juicy steak on top of a mountain of crunchy tortilla chips. Imagine layers of golden, crunchy chips adorned with spiced, juicy steak, accompanied by a symphony of melted cheese, fresh pico de gallo, and creamy guacamole.

This snack deviates from the norm; it is an extravagant celebration of flavors that will captivate your gustatory senses. This dish is sure to be the star of your appetizer selection.

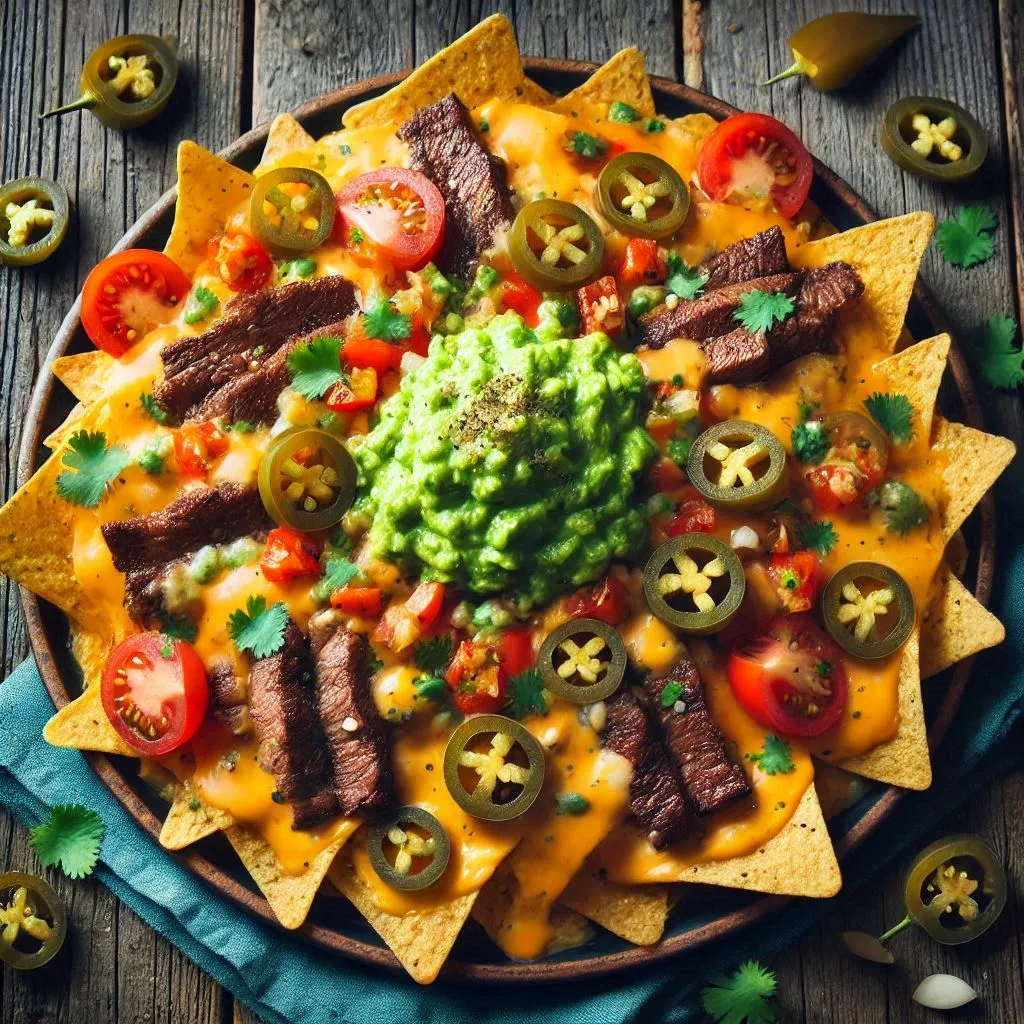
A vibrant and mouthwatering plate of steak nachos, featuring crispy tortilla chips generously topped with juicy grilled steak slices, melted cheese cascading over the sides, fresh jalapeños, diced tomatoes, and a sprinkle of green onions, all artistically arranged on a rustic wooden table with a side of creamy guacamole and zesty salsa in small bowls.

Key Takeaways

  • Steak Nachos Recipes are a crowd-pleasing Tex-Mex dish that combines savory, meaty, and cheesy flavors.
  • The recipe is suitable for omnivores and easy enough for all levels of cooks.
  • Marinating the steak and cooking it quickly at high heat ensures juicy, flavorful results.
  • Customization options include using different meats, salsas, and toppings to suit your preferences.
  • Steak nachos make a great party appetizer or meal starter for game days and family gatherings.

The Irresistible Allure of Steak Nachos

Steak nachos are a crowd-pleaser because of their unique mix of savory steak and crunchy tortilla chips. The steak’s hearty flavors and the chips’ salty crunch make a perfect pair. This combination keeps you wanting more.

Savory Steak and Crunchy Chips Collide

To make your steak nachos recipe a hit, marinate the steak just right. A blend of spices and seasonings in the marinade brings out the steak’s flavor. This makes every bite of your grilled steak nachos burst with taste.

The quality of the tortilla chips is also key for your cheesy steak nachos. Choose chips that are sturdy and crunchy. This way, they can hold up to the toppings without getting soggy. You get a perfect mix of textures in every bite, making it a treat.

“The fusion of savory steak and crunchy tortilla chips creates a delightful contrast that keeps your taste buds craving more.”

Mastering steak marinating and choosing the right chips can take your steak nachos to the next level. They become a favorite at any party, with everyone talking about your cooking.

Mastering the Art of Steak Nachos

Making the perfect steak nachos is an art that needs focus. When you make your cheesy steak nachos or loaded steak nachos, layer the ingredients well. This ensures a mix of flavors and textures that work together.

The beef you choose is very important. Ribeye, sirloin, or skirt steak are great because they are juicy and full of flavor. If you want to save money, leaner cuts like sirloin tip or flank steak are good too. Make sure to marinate the beef for at least 2 hours, or even overnight, to add lots of flavor.

Cooking the beef right is key. Grill the marinated beef for about 4-5 minutes on each side. Or, sear it for 2-3 minutes on each side to get a nice caramelized crust. This step is the start of your game day nachos or party nachos.

  • Dice the beef into bite-sized pieces for easy distribution across the nachos.
  • Choose Monterrey Jack or cheddar cheese to ensure a gooey, melted topping that coats every chip.
  • Enhance the dish with a variety of toppings, such as diced tomatoes, chopped onions, jalapeños, black beans, sour cream, guacamole, and sliced black olives.

The secret to great steak nachos recipe is in how you layer them. Start with a layer of beef and cheese, then add chips. Keep doing this until you have a tall stack. This way, every bite is full of steak flavor, cheese creaminess, and chip crunch.

Getting good at steak nachos takes time, but it’s worth it. They’re perfect for parties or just when you want a big snack. So, get your ingredients ready, fire up the grill, and make a dish that will wow your guests.

Steak Nachos Recipe: A Culinary Masterpiece

Take your party menu to the next level with the ultimate steak nachos recipe. It’s a mix of grilled steak, cheesy goodness, and tasty toppings. Perfect for game-day or a casual hangout, these loaded steak nachos will wow your guests and fill their bellies.

The magic of these tex-mex nachos is in their mix of textures and tastes. Start with crisp tortilla chips, tender grilled steak, and lots of cheddar cheese. Add your favorite toppings like tomatoes, sliced jalapeños, sour cream, and guacamole for a burst of flavor in every bite.

This steak nachos recipe is also super flexible. You can change up the toppings to match your guests’ tastes or use what you have. Try different beef like ground beef or shredded beef, or even chicken or pork for something new.

A vibrant platter of steak nachos, featuring crispy tortilla chips layered with perfectly cooked, juicy steak pieces, melted cheese cascading over the top, fresh jalapeños, diced tomatoes, creamy guacamole, and a sprinkle of fresh cilantro, all set against a rustic wooden background.

To get the best cheesy steak nachos, layer the ingredients right and bake until the cheese is golden and bubbly. Serve them hot from the oven for the best taste and texture. Your guests will love diving in.

Whether it’s a laid-back gathering or a big game-day party, this steak nachos recipe will be a hit. Enjoy the amazing mix of savory steak, melted cheese, and your favorite toppings. It’s a dish that will leave your guests talking.

Elevating the Nacho Experience

When it comes to steak nachos recipe, the right sides can make a big difference. A spicy salsa and a cool sour cream add a nice contrast to the bold flavors. This lets your guests make each bite their own.

Complementary Sides and Drinks

To balance the richness of the restaurant-style nachos, try some refreshing drinks. A margarita can highlight the citrusy notes, while a cold beer complements the spice. For those who don’t drink, chilled sparkling water with lime is a great choice.

Complementary SidesComplementary Drinks
Spicy Salsa Cool Sour CreamMargarita Cold Beer Chilled Sparkling Water with Lime

By choosing the right sides and drinks, you can make the steak nachos recipe unforgettable. It will be a memorable and satisfying meal for your guests.

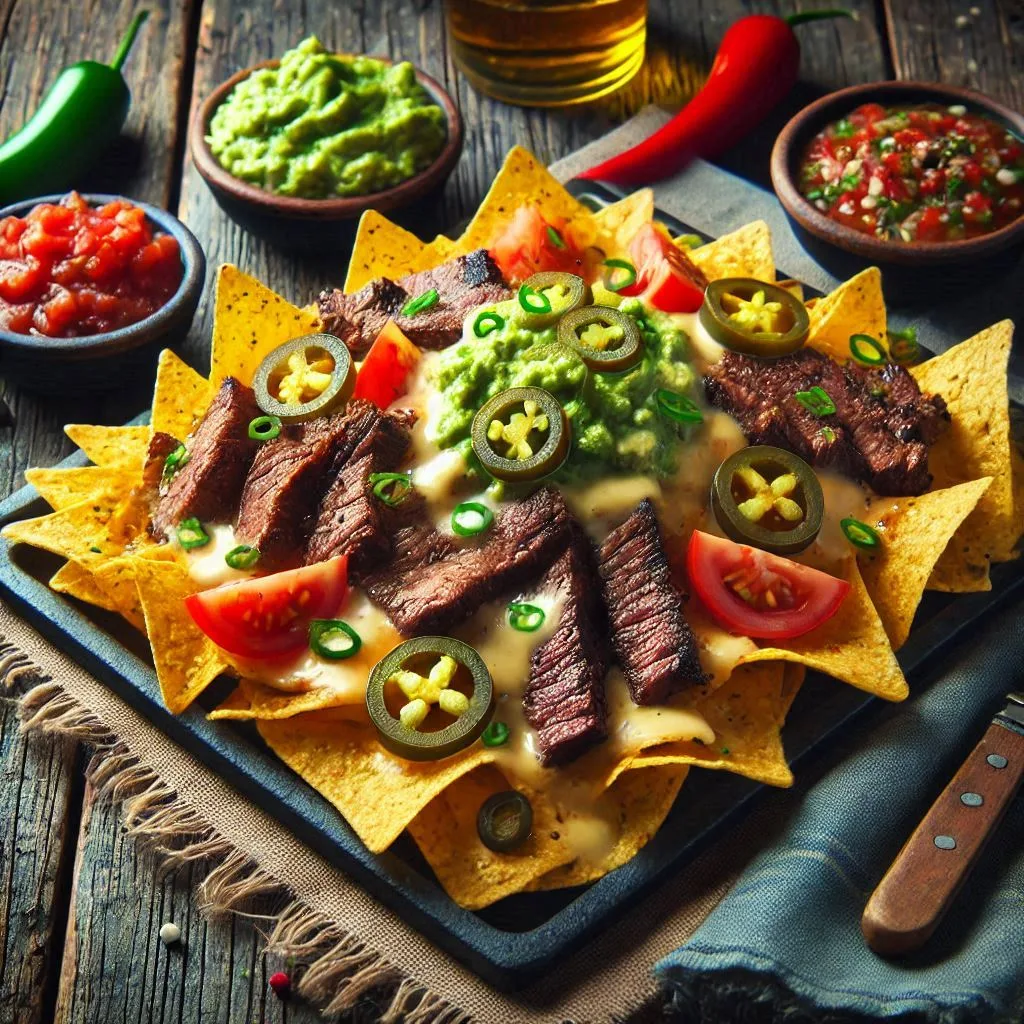
A vibrant platter of steak nachos, featuring golden crispy tortilla chips piled high with tender, juicy steak strips, melted cheese cascading over the top, drizzled with creamy guacamole and fresh salsa, garnished with slices of jalapeños and chopped cilantro, set against a rustic wooden table background with soft, warm lighting.

Conclusion

Steak nachos are more than just a tasty snack. They’re a way to bring people together. With crispy tortilla chips, tender steak, and melted cheese, they delight everyone’s senses. They’re perfect for any gathering, making everyone talk about the flavors.

To make the best steak nachos, you need to prepare well. Slice the steak thinly for even cooking. Balance the toppings to keep the chips crispy. You can try different flavors like BBQ or fajita to please everyone.

Adding toppings like guacamole, salsa, and sour cream makes the dish even better. It’s a true Tex-Mex treat. So, start making your steak nachos and enjoy the process. It’s all about sharing great food with friends and family.

FAQ

What makes steak nachos so irresistible?

The mix of savory steak and crunchy tortilla chips is unbeatable. The steak’s hearty flavors match the chips’ salty crispness. This combo is irresistible.

How do I ensure my steak nachos have the perfect crunch?

Choose high-quality tortilla chips that stay crunchy. Layer the ingredients carefully. Spread melted cheese between layers for the best crunch.

What are some topping ideas to customize my steak nachos?

You can add many toppings to make your nachos unique. Try jalapeños for spice, avocado for creaminess, or fresh tomatoes, onions, and cilantro for flavor and texture.

Serve spicy salsa and cool sour cream for a great taste. A margarita enhances citrus flavors, while a cold beer complements the dish. Chilled sparkling water with lime is also a refreshing choice.

Easy Lavash Bread Recipe: Homemade Armenian Flatbread

Lavash bread recipe

Discover how to make authentic Armenian lavash bread recipe at home. Create thin, crispy flatbread perfect for wraps, dips, and more.

The smell of fresh bread in the kitchen is a joy. It reminds me of my grandmother’s Armenian flatbread, lavash. I loved waiting for her to bake it in her tandoor oven. The whole house would fill with its amazing scent.

Making lavash bread at home is easier than you think. With simple ingredients and a bit of time, you can make it just like my childhood. This recipe is perfect for adding a new cultural touch to your meals or enjoying a taste of the Middle East.

lavash bread recipe

A warm, freshly baked lavash bread, slightly puffed and golden-brown, resting on a rustic wooden surface, with a few scattered grains of flour nearby, soft light illuminating its texture and subtle creases.

Key Takeaways

  • Lavash is a traditional thin, flexible Middle Eastern flatbread popular in Armenia, Turkey, Iran, and other countries.
  • This easy recipe yields a crisp, un-yeasted lavash that only requires 10 minutes of hands-on work to make the dough.
  • Lavash can be used in a variety of dishes, such as wraps, sandwiches, and as an accompaniment to meals.
  • The recipe provides step-by-step instructions for mixing, kneading, shaping, and baking the lavash bread.
  • Lavash is a versatile and nutritious bread option that can be a healthy alternative to pita or soft tortillas.

What is Lavash Bread?

Lavash is a soft, thin flatbread loved in the Middle East, South Caucasus, and the Mediterranean. It’s popular in places like Armenia, Turkey, Iran, and Azerbaijan. This thin flatbread is great for wraps, sandwiches, or as a side dish. It’s made with flour, water, and salt, sometimes with yeast.

Characteristics and Origins of Lavash Bread

Lavash is baked in a tandoor oven. The dough is slapped against the oven’s hot walls. This makes the bread soft, flexible, and slightly smoky. This method has been passed down for generations, making lavash a key part of Turkish cuisine and Armenian bread culture.

Lavash is also known as naan lavash and noon lavash. It’s a favorite middle eastern bread around the world. People love it for its versatile uses and tasty flavor.

IngredientAmount
All-purpose flour2 cups
Whole wheat flour1 cup
Yeast1 teaspoon
Sugar1/2 teaspoon
Lukewarm water1 cup plus 1 tablespoon
Salt1 teaspoon

To make homemade lavash, you need all-purpose and whole wheat flours, yeast, sugar, water, and salt. The dough rises for an hour. Then it’s divided and baked, making a delicious armenian bread with a soft, flexible texture.

“Lavash bread is a staple in Iranian households due to its thin and pliable texture, making it suitable for various dishes like kebabs, sandwiches, and traditional Iranian delicacies.”

lavash bread recipe

Get ready to make your own Armenian flatbread with our simple recipe. This homemade lavash is perfect for wrapping grilled kebabs, veggies, or cheese. It has a crispy, cracker-like texture that’s delightful.

Our recipe is easy. It takes just 10 minutes to make the dough. Then, a quick proof and shape before baking. The secret to great lavash is the flour mix. We use all-purpose and ’00’ flour for its pliable texture.

Ingredients and Equipment Needed

  • 1 kg (2.2 lbs) total amount of flour
  • 1 teaspoon instant yeast
  • 1 teaspoon kosher salt
  • 2 1/2 cups all-purpose flour
  • 2/3 cup warm water
  • 2/3 cup lukewarm whole milk
  • 4 tablespoons olive oil
  • Baking sheet or pizza stone
  • Rolling pin

Mixing and Kneading the Dough

In a large bowl, mix the all-purpose flour, yeast, and salt. Add warm water and lukewarm milk slowly. Mix until a shaggy dough forms.

Turn the dough onto a floured surface. Knead for 5 minutes until it’s smooth and elastic. Place it in a lightly oiled bowl, cover, and rest for 15-20 minutes.

After resting, knead in the olive oil until it’s fully incorporated.

Shaping and Baking the Flatbread

Divide the dough into 4 equal pieces. Shape each into a ball. Cover and rest for 30 minutes.

Roll each ball into a thin, oblong shape, about 1/8 inch thick. Preheat your oven to 425°F (218°C).

Place the dough on a baking sheet or pizza stone. Bake for 10-15 minutes, until golden and crispy. Bake one or two pieces at a time for the best results.

Once baked, sprinkle with seeds like sesame or poppy for extra flavor. Enjoy your homemade traditional Armenian flatbread with its easy unleavened recipe and crispy, cracker-like texture.

Step-by-Step Instructions for Making Homemade Lavash

Making homemade lavash bread is a fun baking adventure. Follow this guide to make your own Armenian flatbread at home.

Ingredients and Equipment Needed

You’ll need some basic ingredients and tools to make lavash. You’ll need flour, water, salt, and olive oil. Also, a rolling pin, baking sheets or stones, and a broiler or oven for baking.

  • All-purpose flour (2 1/2 cups or 310 grams)
  • Whole-wheat flour (1/4 cup or 35 grams)
  • Active dry yeast (2 teaspoons)
  • Granulated sugar (1/2 teaspoon)
  • Kosher salt (1 teaspoon)
  • Olive oil (2 tablespoons)
  • Warm water (1 1/4 cups)

Mixing and Kneading the Dough

Start by proofing the yeast. Mix warm water, yeast, and sugar in a big bowl. Wait 5-10 minutes for it to get frothy.

Then, add flour, salt, and olive oil. Mix until it’s a shaggy dough.

Turn the dough onto a floured surface. Knead for 7-10 minutes until it’s smooth. Put it in a lightly oiled bowl, cover, and let it rise for 2 hours, until it doubles.

Shaping and Baking the Flatbread

After rising, punch down the dough. Divide it into 8 pieces. Roll each into a thin, oval flatbread, about 1/8-inch thick.

Preheat your oven to 500°F with a baking steel or stone inside. Place the dough on the preheated surface. Bake for 5-8 minutes, flipping halfway, until it’s puffed and golden.

lavash bread recipe 1

“Step-by-step visual guide for making lavash bread, showcasing each phase: mixing flour and water in a bowl, kneading dough on a floured surface, rolling out thin rounds of dough, placing them in a traditional oven, and finally displaying freshly baked lavash bread on a wooden board, with warm lighting and a rustic kitchen background.”

Let the lavash cool a bit before serving. Enjoy it with your favorite dips, spreads, or as a side to soups and stews.

Serving and Eating Lavash Bread

Lavash, the Armenian flatbread, is very versatile. It’s great with many dishes, like stews, curries, cheese boards, and dips. Its crisp texture is perfect for these.

Enjoy lavash as a wrap. Fill it with grilled veggies, hummus, or meats. Then, roll it up for a tasty meal. It’s also great for homemade pizzas, thanks to its sturdy yet flexible nature.

For a quick snack, cut lavash into small pieces. Serve it with labneh, avocado spread, or tzatziki. Its neutral taste goes well with many flavors, making it perfect for any time.

For a softer lavash, steam or lightly toast it. This is great for wraps or scooping up stews and curries.

lavash bread recipe 2

A beautifully arranged platter featuring freshly baked lavash bread, surrounded by an assortment of colorful dips like hummus and baba ganoush, alongside vibrant vegetables such as cherry tomatoes, cucumbers, and bell peppers, placed on a rustic wooden table. The scene is illuminated by soft natural lighting, evoking a warm and inviting atmosphere.

Lavash bread is perfect for many cravings. Whether you want a snack, a wrap, or a pizza crust, it’s a versatile choice. Let your creativity run wild with this beloved Armenian flatbread.

Variations and Substitutions

Making homemade lavash bread lets you try different flours and techniques. This way, you can get the texture and flavor you want. The traditional recipe uses all-purpose and ’00’ flours. But, you can use flour alternatives to meet your dietary needs or preferences.

Using Different Flours

Lavash can be made with many flours. Here are a few:

  • All-purpose flour: This flour makes a soft, pliable lavash with a classic taste.
  • Whole wheat flour: It adds a nutty, earthy flavor and a heartier texture to your lavash.
  • Finely milled ’00’ flour: This Italian flour makes a lavash that’s delicate and pliant.

Try mixing different flours to find the perfect flavor and texture for you.

Yeasted vs. Unleavened Lavash

You can also play with leavened vs. unleavened dough in lavash. Yeasted lavash is softer and chewier. Unleavened lavash is crisp and cracker-like. Your choice depends on what you like and how you plan to use the bread.

Whether you use yeast or not, the goal is to make recipe modifications that you enjoy. This way, you keep the texture differences that make lavash so great.

Conclusion

Homemade lavash bread is a delightful and versatile flatbread you can make at home. It only needs a few simple ingredients and quick baking. You can enjoy the authentic flavors and textures of Armenian-style lavash.

Whether you like it soft and chewy or crispy and cracker-like, this recipe is a great start. It lets you explore the culinary versatility of lavash bread.

This article highlights lavash’s rich history and cultural significance. It also talks about its health benefits as a low-fat, preservative-free bread. Plus, it shows how easy it is to make it at home.

By mastering homemade lavash, you can use it in many dishes. From wraps and dips to pizzas, it’s very versatile. It’s a great addition to your kitchen and meal repertoire.

Keep experimenting with different flavors and serving ideas to make lavash your own. Its timeless appeal and adaptability make it a staple in any kitchen. Enjoy making and sharing your homemade lavash bread on social media.

FAQ

What is lavash bread?

Lavash is a thin flatbread from the Middle East. It’s loved in places like Armenia, Turkey, Iran, and Azerbaijan. You can use it for wraps, sandwiches, or as a side dish.

What are the basic ingredients in lavash bread?

To make lavash, you need flour, water, salt, and oil. Mix and knead the dough until it’s smooth. Then, roll it thin before baking.

How is lavash bread traditionally baked?

Traditionally, lavash is baked in a tandoor oven. This gives it a unique texture and smoky taste. But, you can also bake it in a regular oven. Use a hot baking steel or stone under the broiler for a similar effect.

What are the different texture options for lavash bread?

Lavash can be soft and chewy or crispy and cracker-like. The recipe here makes a crispy lavash. It’s great with dips and spreads.

Can I use different flours to make lavash bread?

Yes, you can use different flours for lavash. Try all-purpose, whole wheat, or ’00’ flour for a soft texture. The recipe combines all-purpose and ’00’ flour for the best taste.

Delicious Salmon Breakfast Recipe to Start Your Day

salmon breakfast recipes

Discover mouthwatering salmon breakfast recipe to elevate your morning routine. From classic eggs benedict to innovative creations, start your day with delicious, protein-packed meals.

As the sun rises, a tasty salmon breakfast is perfect to start your day. Salmon is not only delicious but also packed with health benefits. It’s great for the most important meal of the day.

Looking for a savory scramble or a light bowl? These salmon breakfast recipes will make your morning better. They’ll give you energy and prepare you for the day.

salmon breakfast recipes

salmon breakfast recipes

A beautifully plated breakfast featuring a perfectly cooked salmon fillet on a bed of fluffy scrambled eggs, garnished with fresh herbs and lemon slices, served alongside avocado toast and cherry tomatoes, set on a rustic wooden table with a light morning ambiance.

Key Takeaways

  • Salmon is a lean, high-protein, and nutritious option for breakfast
  • Smoked, cured, and raw salmon can be used in various breakfast recipes
  • Salmon breakfast recipe offer a range of flavors and preparation methods
  • Salmon provides heart-healthy omega-3 fatty acids and supports muscle repair
  • Salmon breakfast dishes can be tailored to individual preferences and dietary needs

Why Salmon for Breakfast Recipe?

Adding salmon to your breakfast can change your day. It’s packed with protein for repairing and building tissues. Plus, it’s full of omega-3 fatty acids, which are great for your brain, reduce inflammation, and keep your heart healthy.

High in Protein and Omega-3 Fatty Acids

Salmon is a nutritional powerhouse. It gives you a lot of protein, making you feel full and energized in the morning. The omega-3s in salmon also offer many health benefits, supporting your overall well-being.

Versatile and Delicious

Salmon is also super versatile for breakfast. You can mix it into scrambled eggs, frittatas, avocado toast, or breakfast bowls. Its rich flavor makes your morning meal both healthy and tasty.

So, if you want to increase your protein, support your heart, or just enjoy a great breakfast, try salmon. Your body and taste buds will love it!

Smoked Salmon Recipes

Smoked salmon is a great choice for breakfast. It’s already cooked and ready to use. This makes it easy and tasty to add to your morning meal. Here are two yummy smoked salmon breakfast recipe to start your day.

Smoked Salmon Scrambled Egg Plate

Try this Smoked Salmon Scrambled Egg Plate for a filling breakfast. Sauté diced onions in a pan. Then, add smoked salmon and scramble in fluffy eggs. Finish with crumbled goat cheese for a creamy touch.

This dish is quick to make, ready in just 15 minutes. It has 342.6 calories per serving. With 21g of protein, it keeps you full and energized.

Smoked Salmon Avocado Toast

For a refreshing breakfast, try smoked salmon with creamy avocado on toasted bagel or bread. Add a drizzle of olive oil and fresh lemon juice for a bright start. This smoked salmon breakfast is easy to make and healthy.

Smoked salmon is a delicacy because of its high price. The smoking process keeps it safe and tasty. Whether you like a scramble or avocado toast, smoked salmon is a nutritious way to begin your day.

Salmon Breakfast Bowls

Begin your day with a nutritious salmon breakfast bowl. Try the Salmon Rice Bowl with Jammy Eggs. It has tender salmon, soft-boiled “jammy” eggs, and a spicy sriracha-mayo sauce over fluffy rice. This mix of flavors and textures makes for a great morning meal.

Salmon Rice Bowl with Jammy Eggs

This bowl has a simple yet tasty base of rice. It’s topped with pan-seared salmon and soft-boiled “jammy” eggs. A drizzle of sriracha-mayo adds heat and creaminess.

Fresh veggies like avocado, carrots, and cucumber add a pop of color. This dish is full of protein, healthy fats, and carbs. It’s a balanced and nourishing way to start your day.

IngredientQuantity
Salmon1 lb., cubed into bite-sized pieces
Cooked Rice2 cups
Eggs4 (soft-boiled “jammy” eggs)
Avocado1 medium, sliced
Carrots1 cup, shredded
Cucumber1 cup, diced
Sriracha-Mayo Drizzle1/2 cup

To make the salmon breakfast bowl, place cooked rice, salmon, eggs, and veggies in a bowl. Drizzle with sriracha-mayo sauce. Enjoy this tasty and healthy start to your day.

A beautifully plated salmon breakfast, featuring perfectly cooked salmon fillets on a bed of creamy scrambled eggs, garnished with fresh herbs, sliced avocado, and cherry tomatoes, all presented on a rustic wooden table with a side of crispy whole grain toast and a steaming cup of coffee.

A vibrant salmon breakfast bowl featuring perfectly cooked salmon fillet on a bed of fluffy quinoa, topped with avocado slices, cherry tomatoes, and a sprinkle of sesame seeds, surrounded by a colorful array of fresh spinach and radishes, served in a rustic ceramic bowl with a light drizzle of lemon dressing, set against a sunlit kitchen backdrop.

Salmon Breakfast Recipes

There are many tasty salmon breakfast recipe to try. A Salmon Frittata is a great choice, packed with protein. It has tender salmon, fresh veggies, and creamy cheese in a fluffy egg base. For a quick breakfast, try a Salmon Bagel Spread with smoked salmon, cream cheese, and herbs on a toasted bagel. These recipes show how to add salmon to your morning meal in different ways.

Salmon Frittata

Salmon Frittata is a nutritious and filling breakfast. It’s made with eggs, salmon, and veggies in one pan. Whisk eggs, milk, and seasonings, then add cooked salmon and sautéed veggies. Bake until it’s golden and set. Serve warm with fresh herbs for a protein-rich start to your day.

Salmon Bagel Spread

Make a quick Salmon Bagel Spread with smoked salmon, cream cheese, and herbs like dill or chives. Spread it on a toasted bagel for a tasty, easy breakfast. Add a tomato or red onion for extra flavor and crunch. This spread is a delicious, convenient way to enjoy salmon in the morning.

A beautifully plated salmon breakfast, featuring perfectly cooked salmon fillets on a bed of creamy scrambled eggs, garnished with fresh herbs, sliced avocado, and cherry tomatoes, all presented on a rustic wooden table with a side of crispy whole grain toast and a steaming cup of coffee.

A beautifully plated salmon breakfast, featuring perfectly cooked salmon fillets on a bed of creamy scrambled eggs, garnished with fresh herbs, sliced avocado, and cherry tomatoes, all presented on a rustic wooden table with a side of crispy whole grain toast and a steaming cup of coffee.

Indulgent Salmon Brunch Dishes

Looking for a fancy salmon breakfast or brunch? There are many tasty and impressive options. The classic

Smoked Salmon Eggs Benedict

is a top choice. It has a toasted English muffin, poached eggs, smoked salmon, and creamy hollandaise sauce. Another rich option is the

Salmon and Broccoli Quiche

. It mixes tender salmon, fresh broccoli, and a creamy egg custard in a flaky crust. This makes for a filling and tasty meal.

Smoked Salmon Eggs Benedict

This dish starts with a toasted English muffin. It’s topped with a poached egg and lots of smoked salmon. The hollandaise sauce, made from egg yolks, lemon, and butter, brings everything together. Add some sautéed spinach or hash browns for a fancy brunch.

Salmon and Broccoli Quiche

The Salmon and Broccoli Quiche is a heartier choice. It combines salmon and broccoli in a flaky pie crust. The egg custard filling, with cream and seasonings, is incredibly rich. Serve it with a salad or roasted potatoes for a full meal.

Choose the Smoked Salmon Eggs Benedict or the Salmon and Broccoli Quiche for a fancy brunch. These dishes will wow your guests and make your day delicious.

Conclusion

Salmon is a versatile and nutritious ingredient that can elevate your breakfast routine. It can be used in many ways, from classic smoked salmon dishes to innovative breakfast bowls and frittatas. These recipes will make your mornings delicious and satisfying.

These salmon-based breakfast options are not only tasty but also healthy. Salmon is rich in omega-3 fatty acids, which are good for your heart, brain, and overall health. Adding salmon to your breakfast can make it both nutritious and energizing.

Whether you want a savory smoked salmon omelette, a refreshing salmon breakfast bowl, or a decadent salmon and broccoli quiche, you’re covered. Try different flavors and techniques to find your favorite salmon breakfast dish. Enjoy the delicious, protein-packed start to your day.

FAQ

What are the benefits of eating salmon for breakfast?

Salmon is great for breakfast because it’s full of protein. This helps fix and grow tissues. It also has omega-3 fatty acids, which are good for your brain, reduce inflammation, and keep your heart healthy.

How can I incorporate smoked salmon into my breakfast?

You can make many tasty dishes with smoked salmon for breakfast. Try a Smoked Salmon Scrambled Egg Plate with sautéed onions, scrambled eggs, and goat cheese. Or, make Smoked Salmon Avocado Toast with avocado, smoked salmon, olive oil, and lemon juice.

What are some salmon breakfast bowl recipes I can try?

A great salmon breakfast bowl is the Salmon Rice Bowl with Jammy Eggs. It has tender salmon, soft-boiled eggs, and a spicy sriracha-mayo sauce over fluffy rice. It’s a tasty and filling breakfast.

What other salmon breakfast recipe can I make?

There are many more salmon breakfast recipe to try. You can make a Salmon Frittata with salmon, veggies, and cheese. Or, try a Salmon Bagel Spread with smoked salmon, cream cheese, and herbs on a toasted bagel.

What are some indulgent salmon breakfast or brunch dishes?

For a fancy salmon breakfast or brunch, try Smoked Salmon Eggs Benedict. It has a toasted English muffin, poached egg, smoked salmon, and hollandaise sauce. Or, make a Salmon and Broccoli Quiche with salmon, broccoli, and egg custard in a pie crust. It’s a hearty and delicious meal.

VMC Drinks: Refreshing Beverages for Every Taste

VMC Drinks

Discover VMC drinks, a diverse range of refreshing beverages crafted to suit every palate. Explore our innovative flavors and find your perfect thirst-quenching companion today.

When the sun is high and it’s hot outside, we all want something cool and tasty. VMC Drinks has a wide range of drinks that everyone can enjoy. They bring the lively spirit of Mexico to your glass, making every sip a journey of new tastes.

VMC Drinks

A vibrant assortment of VMC drinks displayed on a wooden bar, featuring colorful bottles of various refreshing beverages including sparkling water, fruit juices, and iced teas, surrounded by fresh fruits and ice cubes, under soft natural lighting.

Key Takeaways

  • VMC Drinks offers a diverse range of refreshing beverages inspired by Mexican heritage.
  • The brand is committed to using high-quality ingredients and delivering authentic flavors.
  • VMC Drinks caters to various taste preferences, ensuring there’s a thirst-quenching option for everyone.
  • The brand’s beverages are designed to be enjoyed for any occasion, from casual gatherings to sophisticated events.
  • VMC Drinks’ innovative packaging and distribution strategies make their products easily accessible to consumers.

VMC Drinks: Introducing an Iconic Brand

VMC Drinks, short for “Viva Mexico Cabrones,” celebrates Mexican roots. It draws inspiration from traditional aguas frescas and classic cocktails. The company aims to bring Mexico’s vibrant flavors to life.

VMC Drinks uses top-notch ingredients and authentic recipes. This commitment ensures a true taste of Mexican culture in every drink.

Viva Mexico Cabrones: A Taste of Mexican Heritage

VMC Drinks deeply values Mexican heritage. Its name, “Viva Mexico Cabrones,” is a fun tribute to Mexico’s rich traditions. Each product honors classic Mexican drinks with a modern twist and high quality.

VMC’s Commitment to Quality and Authenticity

Quality and authenticity are core to VMC Drinks. The brand chooses trusted suppliers for its ingredients. This ensures every sip is a true taste of Mexico.

From the recipes to the drink packaging, VMC Drinks focuses on detail. It aims to give customers a real Mexican experience.

“We believe that the best way to honor Mexican culture is to provide our customers with products that capture the essence of its flavors and traditions. That’s why quality and authenticity are at the heart of everything we do.”

VMC Drinks’ quality and authenticity shine in its vmc product line. The brand’s focus on vmc flavors and drink packaging sets it apart. Its dedication to a genuine Mexican taste makes it stand out in the market.

Viva Mexico Cabrones drinks: A Diverse Range of Flavors

At VMC Drinks, we’re proud to offer a wide range of canned cocktails. Our selection caters to many tastes. Each drink has its own twist to excite your senses.

Margarita: A Classic with a Twist

The Viva Mexico Cabrones Margarita is a mix of sweet and sour, just like the classic. It has a zesty lime taste and a bit of fizz. Every sip is a refreshing, true margarita experience.

Paloma: A Refreshing Citrus Delight

The VMC Paloma is great for those who love citrus. It’s a grapefruit-filled drink with a smooth, bubbly finish. It’s perfect for hot summer days or nights with friends.

Looking for a classic margarita or a zesty paloma? VMC Drinks has you covered. Our vmc product line and vmc flavors offer something for every taste. And they come in our convenient drink packaging.

VMC Drinks 2

A colorful display of various VMC drink bottles arranged artistically on a vibrant background, showcasing a diverse range of flavors and styles, with each bottle featuring unique colors and designs that represent their distinct tastes, surrounded by fresh fruits and ice to enhance the refreshing theme.

The Unique Hibiscus Infusion

VMC Drinks has added a new twist to their vmc flavors with the Hibiscus Infusion. It mixes the floral sweetness of hibiscus with the smoothness of premium tequila. This blend offers a refreshing and unique taste.

This drink shows VMC’s creativity in making flavors for everyone. By combining hibiscus’s tangy flavor with tequila’s balance, they’ve made a standout drink packaging. It’s a great choice for those looking for something different from usual cocktails.

“The Hibiscus Infusion is a true celebration of our commitment to quality and authenticity. It’s a unique twist on a classic that allows our customers to explore new flavor experiences.”

Sarah Thompson, VMC Drinks Product Manager

The Hibiscus Infusion shows VMC’s commitment to making exciting drinks. It’s perfect for sipping on its own or as a base for creative cocktails. This drink is sure to impress anyone who tries it.

Viva Mexico Cabrone’s Innovative Approach to Packaging and Distribution

VMC Drinks has a unique strategy for packaging and distribution. They make sure their drinks are easy to find and use. They offer their famous flavors in cans, perfect for people on the go.

Convenient Canned Cocktails for On-the-Go Enjoyment

VMC’s canned cocktails are easy to carry around. They’re great for when you’re out and about. You can enjoy the same great taste as their bottles, but it’s more convenient.

VMC’s Distribution Network and Marketing Strategies

Viva Mexico Cabrones has a wide network of places where you can buy their vmc product line. You can find them in local stores and big supermarkets. This makes it simple for people to try their drinks.

Viva Mexico Cabrones also uses smart marketing to get their message out. They focus on their Mexican roots and quality. With the right ads and social media, they attract more fans and stay ahead in the market.

StatisticData
VMC Drinks formed in2022 by Mexican spirits group Casa Lumbre
The display created for VMC aimed toincrease brand awareness in the U.S.
The display successfullydrove sales and heightened brand recognition among the target Mexican audience
The colors chosen for the display weregreen, white, and red, reflecting the Mexican flag
VMC Drinks 3

A visual representation of VMC distribution channels, showcasing a modern logistics warehouse filled with vibrant, refreshing beverage products, surrounded by various transportation methods like trucks, drones, and delivery vans. Include diverse employees engaged in packing and loading beverages, with a backdrop of a digitally rendered map indicating different distribution routes and locations, all in a clean and bright aesthetic.

Ingredients for the Perfect VMC Drink

To create a delightful VMC Drink, we need to gather the following ingredients:

Fresh Ingredients:

  • 2 cups fresh orange juice (preferably freshly squeezed for optimal flavor)
  • 1 cup fresh lemon juice (to add a tangy kick)
  • 1 cup fresh pineapple juice (for a tropical touch)
  • 1/2 cup fresh mint leaves (for a refreshing aroma)
  • 1/4 cup honey or agave syrup (for natural sweetness; adjust to taste)
  • 4 cups sparkling water (for a fizzy finish)
  • Ice cubes (for serving)
  • Slices of citrus fruits and mint sprigs (for garnish)

Equipment Needed:

  • A large pitcher or mixing bowl
  • A juicer (if using whole fruits)
  • A muddler or wooden spoon
  • A whisk or fork
  • A serving glass

Step-by-Step Instructions to Create Your VMC Drink

Step 1: Prepare the Juices

Begin by preparing the fresh juices. If you are using whole fruits, cut the oranges, lemons, and pineapples into manageable pieces. Using a juicer, extract the juice from each fruit until you have the specified amounts: 2 cups of orange juice, 1 cup of lemon juice, and 1 cup of pineapple juice. Ensure to strain the juices to remove any pulp for a smoother drink.

Step 2: Muddle the Mint

In a large pitcher or mixing bowl, add the fresh mint leaves. Using a muddler or the back of a wooden spoon, gently press the mint leaves to release their essential oils. This process enhances the aromatic profile of the drink, making it more refreshing.

Step 3: Combine the Ingredients

Next, add the prepared fruit juices to the pitcher with the muddled mint. Stir the mixture gently to combine the flavors. Following this, drizzle in the honey or agave syrup. This natural sweetener balances the tartness of the lemon and the sweetness of the orange and pineapple juices. Adjust the sweetness to your liking by adding more or less honey.

Step 4: Mix in the Sparkling Water

Now it’s time to add the sparkling water. Pour in the 4 cups of sparkling water and give the mixture a gentle stir. This step creates the fizzy sensation that makes VMC Drinks so refreshing.

Step 5: Serve Over Ice

Prepare your serving glasses by filling them with ice cubes. Pour the VMC Drink over the ice, allowing the refreshing concoction to chill and enhance the overall experience.

Step 6: Garnish for Presentation

To elevate the aesthetic appeal of your VMC Drinks, garnish each glass with slices of citrus fruits (like oranges and lemons) and a few mint sprigs. This not only adds to the presentation but also intensifies the fresh aroma that wafts through the air.

Step 7: Enjoy Your Refreshing VMC Drink

Serve the VMC Drinks immediately and enjoy the burst of flavors that dance on your palate. This drink is perfect for summer barbecues, picnics, or simply as a refreshing treat after a long day.

Variations of VMC Drinks

While the classic VMC Drink is a delight on its own, there are several variations you can explore to customize the experience:

  • Berry VMC: Add fresh berries such as strawberries, blueberries, or raspberries for a burst of color and flavor.
  • Spiced VMC: Incorporate a hint of ginger or a dash of cinnamon for a warming touch, perfect for cooler days.
  • Herbal Twist: Experiment with different herbs, like basil or rosemary, to add a unique flavor profile.

Health Benefits of VMC Drinks

VMC Drinks not only tantalize the taste buds but also offer numerous health benefits:

  • Hydration: With a high water content, these drinks help keep you hydrated, especially during hot weather.
  • Vitamin C: Packed with vitamins from the citrus juices, VMC Drinks support your immune system.
  • Digestive Aid: The fresh mint aids digestion and provides a soothing effect on the stomach.

Conclusion

VMC Drinks has become a brand that celebrates Mexico’s vibrant heritage. It offers high-quality, refreshing drinks to everyone. With a wide range of flavors, from classic cocktails to unique infusions, it meets many tastes.

The brand is known for its true-to-life drinks and innovative packaging. It has made a name for itself in the drink manufacturing world. VMC Drinks aims to give genuine and refreshing experiences to its customers.

As VMC Drinks grows and introduces new products, its legacy will only get stronger. It stands out as a champion of Mexican heritage and a maker of top-notch drinks. With everything from classic cocktails to unique infusions, VMC Drinks offers a refreshing and authentic taste of Mexico.

FAQ

What is Viva Mexico Cabrones Drinks?

VMC Drinks offers a wide range of refreshing drinks for all tastes. It draws from Mexican traditions to create unique flavors. These drinks are perfect for any time, offering a refreshing choice.

What is the meaning behind the Viva Mexico Cabrones Drinks brand name?

“VMC Drinks” stands for “Viva Mexico Cabrones.” It celebrates Mexican culture. The brand brings together traditional aguas frescas and classic cocktails, offering vibrant Mexican flavors.

How does Viva Mexico Cabrones Drinks ensure quality and authenticity?

VMC Drinks focuses on quality and authenticity. It uses top-notch ingredients and true recipes. This commitment to Mexican culture is at the heart of the brand.

What are some of the classic cocktail-inspired flavors offered by VMC Drinks?

Viva Mexico Cabrones Drinks has a variety of flavors, including cocktail-inspired ones. The VMC Margarita is a mix of sweet and sour, with a zesty lime taste. The VMC Paloma is a citrusy delight, with a grapefruit rush and a smooth finish.

What makes the Hibiscus Infusion unique?

The Hibiscus Infusion blends hibiscus’s floral sweetness with tequila’s smoothness. It’s a refreshing and unique drink. This shows VMC’s creativity in offering different flavors.

How does Viva Mexico Cabrones Drinks make its products accessible to consumers?

VMC Drinks makes its drinks easy to find and enjoy. They come in cans, perfect for drinking on the go. The brand also has a wide distribution network, making its drinks available in many places.

How does Viva Mexico Cabrones Drinks market and promote its brand?

VMC Drinks uses marketing to highlight its Mexican heritage and quality. Its focus on authentic and refreshing drinks sets it apart in the market.

  • Beverage of the week: Canelo Alvarez’s VMC canned cocktails, sigh, pack a wicked punch – https://ftw.usatoday.com/lists/vmc-canned-cocktail-review-canelo-alvarez-margarita-paloma
  • Hottest Summer ’24 Beverages – https://reyesholdings.com/newsroom/hottest-summer-24-beverages
  • Jennifer Lopez Debuts Tequila-Centric Delola Light Margarita – https://bottleraiders.com/ready-to-drink/jennifer-lopez-debuts-tequila-centric-light-margarita/
  • What’s Driving Functional Beverages – https://progressivegrocer.com/whats-driving-functional-beverages
  • Events – Assembly Park – https://assemblypark.ca/events/
  • VMC Boxing Ring Lobby Display – Success Stories – https://www.greatnortherninstore.com/success-stories/vmc-display/
  • Thompson Auctioneers, Inc. | Auction Results – https://www.thompsonauctioneers.com/showcase
  • Lifestyle Press Releases & News – PR.com – https://www.pr.com/news-by-category/92
  • Who Sponsors Canelo Alvarez? Endorsements, Net Worth, and More – https://www.essentiallysports.com/boxing-news-who-sponsors-canelo-alvarez-endorsements-net-worth-and-more/
  • Canelo Alvarez: Inspiring a World of Latinos with Free Fights and Entrepreneurial Triumphs – https://www.linkedin.com/pulse/canelo-alvarez-inspiring-world-latinos-free-fights-eric-rodriguez-kmoqc

Transfusion Drink: The Ultimate Refreshing Cocktail

transfusion drink

When the sun is high and it’s hot, a Transfusion drink is perfect. It’s a cool, fizzy cocktail that’s easy to drink. It’s loved by golfers and anyone looking for a refreshing drink in the summer.

This drink mixes vodka, Concord grape juice, and ginger ale. It tastes refreshing and balanced. It’s great for relaxing by the pool, playing golf, or just taking a break from the heat.

Key Takeaways

  • The Transfusion drink is a popular and refreshing cocktail that combines vodka, Concord grape juice, and ginger ale.
  • It’s known for its crisp, revitalizing taste, making it a favorite among golfers and those seeking a tasty way to cool down in the summer.
  • The Transfusion drink is a versatile cocktail that can be enjoyed in a variety of settings, from poolside relaxation to post-round golf celebrations.
  • This fizzy and easy-to-drink beverage offers a refreshing oasis that can transport you to a place of pure bliss.
  • The Transfusion drink is a great way to stay hydrated and replenish electrolytes, making it an ideal choice for those seeking a healthier cocktail option.

What is a Transfusion Drink?

The transfusion drink is a refreshing cocktail loved by many in the golfing community, especially in the Northeast. It’s said to have been a favorite of former President Dwight D. Eisenhower. He enjoyed it at the Eldorado Country Club in Palm Desert and at the famous Augusta National Golf Club.

The Origins of the Transfusion Cocktail

The exact origins of the transfusion drink are unclear. However, its name sparks a lot of debate. Some think it’s called a transfusion because it “transfuses” your blood with alcohol. Others believe it was made to cure hangovers, thanks to the ginger ale and grape juice.

A Drink Beloved by Golfers

The transfusion drink is a favorite on golf courses everywhere. Its mix of vodka, grape juice, and ginger ale is perfect for golf. It’s refreshing and helps beat the summer heat.

IngredientQuantity
Vodka3 ounces
Grape Juice2 ounces
Lime Juice1/2 ounce
Ginger AleTop off
Garnishes (optional)Lime wheel, grape, candied ginger cube

Transfusion Drink Recipe

The transfusion drink is a favorite among golfers and non-golfers. It’s easy to make and always a hit. Let’s explore how to make this tasty drink.

Ingredients and Proportions

Here’s what you need for a classic transfusion drink:

  • 3 oz (about 2 shots) of vodka, such as Tito’s
  • 1.5 oz (about 1 shot) of Concord grape juice
  • 0.25 oz (about 2 lime wedges) of fresh lime juice
  • Ginger ale

Mixing and Garnishing Instructions

Here’s how to make the perfect transfusion drink:

  1. Fill a glass (preferably a highball glass) with ice.
  2. Add the vodka, grape juice, and lime juice. Stir gently.
  3. Top with ginger ale to finish.
  4. Garnish with a lime wedge or frozen grapes, if desired.

The transfusion drink has a tart yet sweet taste. The ginger ale adds a zesty kick. The Concord grape juice brings depth, while the lime juice makes it refreshing. Use top-notch ingredients and find the right balance for your taste.

“The transfusion drink is the ultimate golf cocktail, refreshing and hydrating in equal measure.”

Health Benefits of the Transfusion Drink

The transfusion drink is more than a tasty golf course treat. It also brings health benefits like hydration and electrolyte replenishment.

The mix of grape juice and ginger ale gives a natural boost of sugars and electrolytes. These are key for fixing fluid balance and helping muscles recover after exercise. The ginger ale’s fizz can also ease an upset stomach, making it a good post-workout recovery or hangover remedy.

Enjoying the vodka in moderation is important. Yet, the transfusion drink’s nutrient-rich mix can be a refreshing way to replenish fluids and electrolytes after a workout or a long day outside.

“The transfusion drink is a unique cocktail that offers both refreshment and potential health benefits. Its combination of natural sugars, electrolytes, and carbonation make it a valuable option for hydration and post-activity recovery.”

The classic transfusion drink recipe uses vodka, ginger ale, and Concord grape juice. But, you can try different variations to change the flavors. Some like to use gin or whiskey instead of vodka for a unique taste.

Others might try cranberry juice for a new twist. These changes let you make the drink your own. If you want a drink without alcohol, you can use non-alcoholic ginger beer and grape juice or soda.

The transfusion cocktail gets a 4.7 out of 5 rating from 7 votes. It serves 2 people and has about 250 calories per serving. The recipe calls for 3 ounces of vodka, 2 ounces of Concord grape juice, and 1/2 ounce of lime juice.

It has 14g of carbs, 2g of protein, 2g of fiber, and 12g of sugar. You can garnish it with a lime wheel, grape, and candied ginger cube. This adds a personal touch to your drink.

Changing the drink can mean using different alcohols like gin or whiskey. You can also try different citrus juices or add a bit of cranberry juice. Serving it over ice in tall glasses keeps it cool and refreshing.

For a drink without alcohol, just leave out the vodka. Use non-alcoholic ginger beer or ginger ale with lime juice and grape juice or soda. This is a great option for those who want a mocktail.

Serving Suggestions for the Transfusion Drink

The Perfect Summer Sipper

The transfusion drink is perfect for hot summer days. It combines chilled ginger ale, sweet grape juice, and lime for a refreshing taste. It’s a great summer cocktail.

For a classic look, serve it over ice in a tall glass. It’s perfect on its own or with a light meal. It’s great for outdoor events, pool parties, or just relaxing.

To make it even better, add a lime wheel, candied ginger cubes, or fresh grapes. These touches add elegance and improve the drink’s taste.

Whether you’re having a summer party or just want something cool, the transfusion drink is a hit. It’s sure to please everyone.

Transfusion Drink: A Nostalgic Taste of the Golf Course

The transfusion drink is a favorite in the golf world, especially in the United States. It’s loved because of its connection to former President Dwight D. Eisenhower. He enjoyed it at the Eldorado Country Club in Palm Desert and at Augusta National Golf Club.

Today, the transfusion cocktail is still a hit at many golf courses and country clubs. It brings back memories of the game. Muirfield Village Golf Club in Dublin, Ohio, and Harbour Town Golf Links in Hilton Head, South Carolina, are famous for their great transfusion drinks.

The drink is made with 2 oz of vodka, 2 oz of grape juice, and 4 oz of ginger ale. This mix reminds many of a childhood juice box. It’s why the drink is so popular among golfers and fans.

“The transfusion drink is a cocktail that offers a refreshing and rejuvenating taste, making it a go-to choice for golfers looking to quench their thirst on the course.”

The grape juice in the transfusion cocktail might also help with electrolytes. This could be why it’s a favorite after a round of golf. There are even diet versions, like one with diet ginger ale and Gatorade Zero, for those watching their health.

Whether you’re at Muirfield Village Golf Club or Harbour Town Golf Links, the transfusion drink is a treat. It reminds us of the history and friendship in the golf world.

transfusion drink golf course

Making a Non-Alcoholic Transfusion Drink

Creating a non-alcoholic version of the transfusion drink is easy and fun. Use ginger beer or ginger ale instead of vodka. Replace grape juice with Gatorade Zero for a sugar-free option. This way, you can enjoy the drink’s flavors without alcohol.

This mocktail is perfect for staying hydrated and replenishing electrolytes. It’s great after a workout or any activity. Try different juices and sodas to find your favorite non-alcoholic transfusion.

  1. Start with 2 oz of non-alcoholic ginger beer or ginger ale.
  2. Add 2 oz of Gatorade Zero or another zero-sugar grape juice.
  3. Squeeze in 1/2 oz of fresh lime juice for a tangy twist.
  4. Garnish with a lime wedge or frozen grapes for a refreshing touch.

With these simple changes, you can enjoy the classic transfusion flavors without alcohol. This drink is refreshing, hydrating, and low in calories. It’s perfect for any time.

Remember, the key to a great non-alcoholic transfusion is finding the right balance of flavors to suit your taste. Experiment and have fun with it!

Transfusion Drink: The Ultimate Post-Workout Refresher

The transfusion drink is a great choice after working out. It’s a mix of grape juice, ginger ale, and a bit of vodka. It’s not just tasty; it also helps with your fitness goals.

Grape juice and ginger ale in the transfusion drink help you rehydrate. The juice’s sugars boost your energy. The ginger ale’s bubbles can ease a sore stomach, aiding in muscle recovery.

Whether you prefer the drink with vodka or without, it’s good for your post-workout routine. Its refreshing taste and benefits help you recover and stay hydrated. This makes it a great choice for anyone looking to bounce back from a workout.

The Benefits of the Transfusion Drink for Post-Workout Recovery

  • Provides hydration and electrolyte replenishment to support fluid balance
  • Contains natural sugars to help restore depleted energy levels
  • The carbonation can help settle an upset stomach after intense exercise
  • Can be enjoyed as an alcoholic or non-alcoholic option, depending on personal preference
  • Offers a refreshing and flavorful way to support your overall fitness and recovery goals
Nutrition Facts (per 8 oz serving)Alcoholic Transfusion DrinkNon-Alcoholic Transfusion Drink
Calories160130
Carbohydrates25g32g
Sugars22g30g
Sodium35mg40mg
Alcohol1.2g0g

Both the alcoholic and non-alcoholic versions of the transfusion drink are good for your post-workout routine. They help you rehydrate, replenish, and recover easily.

transfusion drink post-workout

Where to Find the Best Transfusion Drinks

The transfusion drink is a favorite among golfers. You can find it in many places, especially where golf is big. Golf clubs and country clubs often have it on their menus. It’s a great way for golfers to cool off after playing.

Places like Muirfield Village Golf Club in Dublin, Ohio, and Harbour Town Golf Links in Hilton Head, South Carolina, are famous for their transfusion cocktails. They use top-notch ingredients like Tito’s or Absolut lime vodka and Canada Dry ginger ale. This makes the drink taste just right.

But you don’t have to be at a golf club to enjoy a transfusion drink. Some bars and restaurants that focus on classic or craft cocktails also serve it. They make sure the drink is made just right, with vodka, grape juice, and ginger ale. It’s often served with a lime wedge.

To find the best transfusion drinks, look for places known for quality ingredients and great cocktail making. These spots offer a taste of nostalgia and refreshment. It’s a must-try for anyone who loves golf or just great drinks.

Conclusion

The transfusion drink is a refreshing mix of vodka, Concord grape juice, and ginger ale. It started in the golfing world and is now loved at many golf courses and country clubs. It’s perfect for cooling down on a hot day.

It’s not just a drink; it also helps with staying hydrated and replenishing electrolytes. This makes it great after working out too.

Whether you like the original or a non-alcoholic version, the transfusion is a great choice. It’s easy to make and can be served in many ways. It’s a favorite for summer, great for barbecues, picnics, and more.

When trying transfusions drinks, remember to drink in moderation and watch the sugar. Stay hydrated too. With a bit of creativity, the transfusion drinks can be your top pick for staying cool and making memories.

FAQ

What is a transfusion drink?

The transfusion drink is a refreshing cocktail. It mixes vodka, Concord grape juice, and ginger ale. It’s loved for its cool taste, perfect for golfers and anyone wanting to cool down in summer.

What are the origins of the transfusion drink?

The transfusion drink’s origins are a bit of a mystery. But, it’s linked to the golfing world in the U.S., especially in the Northeast. Some say former President Dwight D. Eisenhower helped make it popular, enjoying it at his favorite golf clubs.

How do you make a classic transfusion drink?

To make a classic transfusion drink, you need vodka, Concord grape juice, lime juice, and ginger ale. Fill a glass with ice, add vodka, grape juice, and lime juice. Then, top with ginger ale and stir gently. You can garnish with a lime wedge or frozen grapes.

What are the health benefits of the transfusion drink?

The grape juice and ginger ale in the transfusion drink offer natural sugars and electrolytes. They help balance fluids and support muscle recovery after exercise. The ginger ale’s carbonation can also ease an upset stomach, making it a hangover remedy.

What are some popular variations of the transfusion drink?

The classic recipe uses vodka, ginger ale, and Concord grape juice. But, you can try different variations. Some like gin or whiskey instead of vodka. Others experiment with fruit juices like cranberry for a unique twist. For a non-alcoholic version, use ginger beer or soda and grape juice.

When is the best time to enjoy a transfusion drink?

Enjoy a transfusion drink in the warm summer months. Its chilled, fizzy mix of ginger ale, sweet grape juice, and lime is refreshing. It’s great on its own or with a light meal, perfect for outdoor events or relaxing on a hot day.

Where can I find the best transfusion drinks?

You can find the transfusion drink at golf clubs and country clubs. Places like Muirfield Village Golf Club in Dublin, Ohio, and Harbour Town Golf Links in Hilton Head, South Carolina, often serve it. Bars and restaurants that focus on classic or craft cocktails may also have it on their menus.